Welcome, Guest
Username: Password: Remember me
  • Page:
  • 1

TOPIC: Alumacraft Flying D, transom
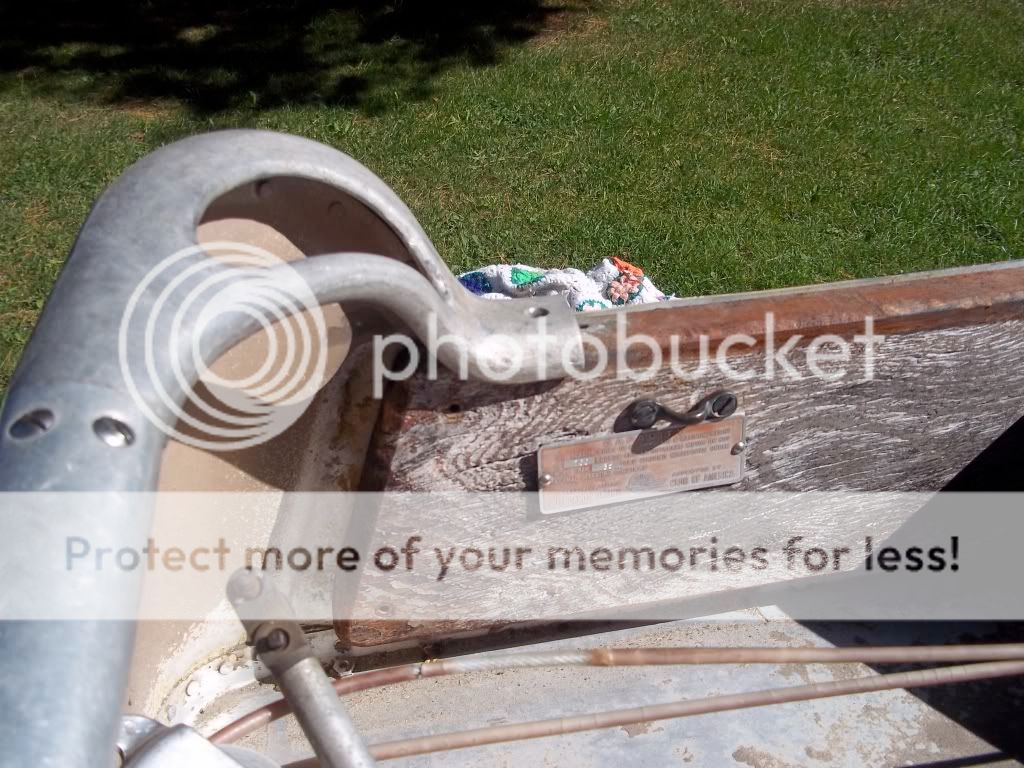
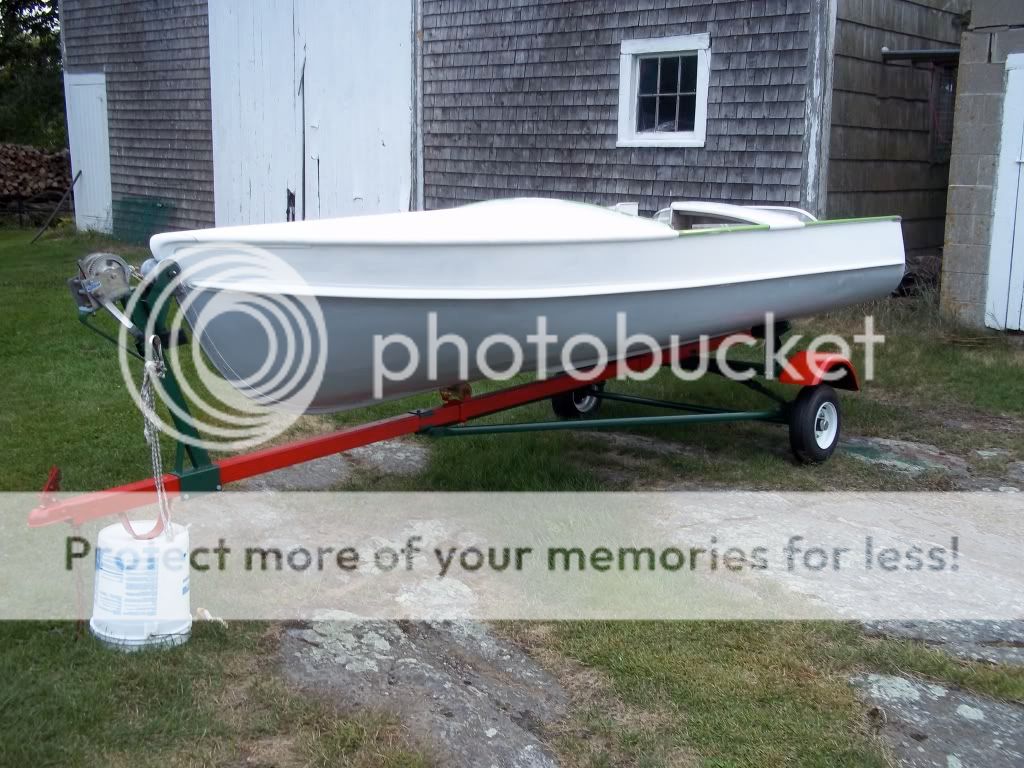
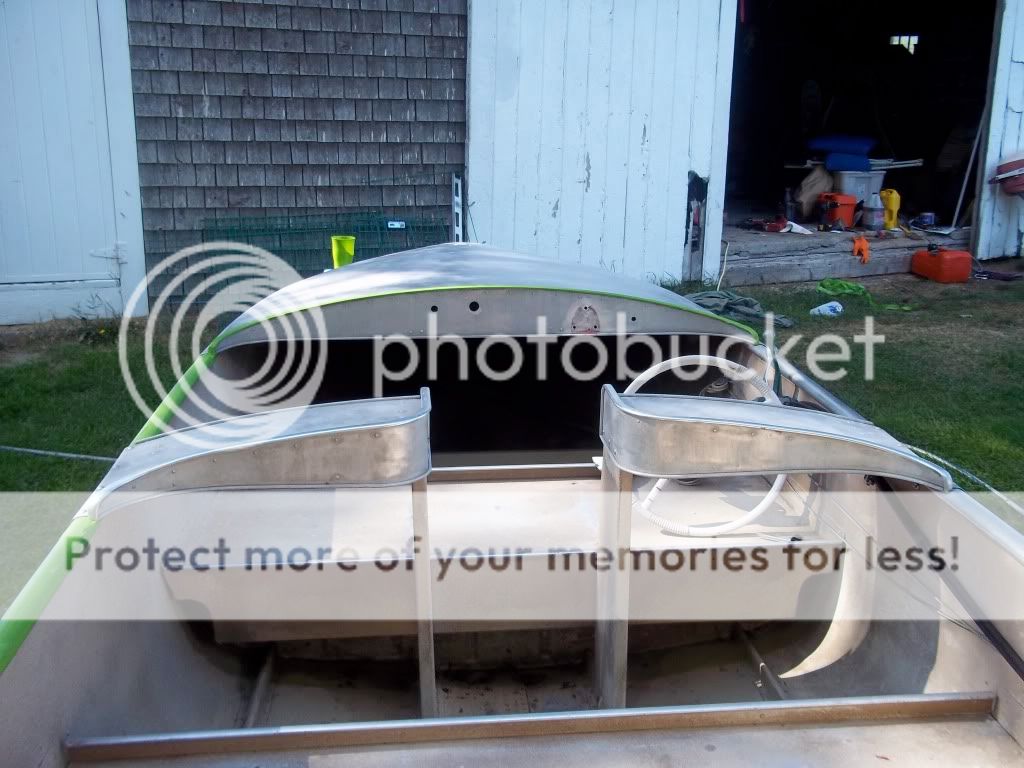
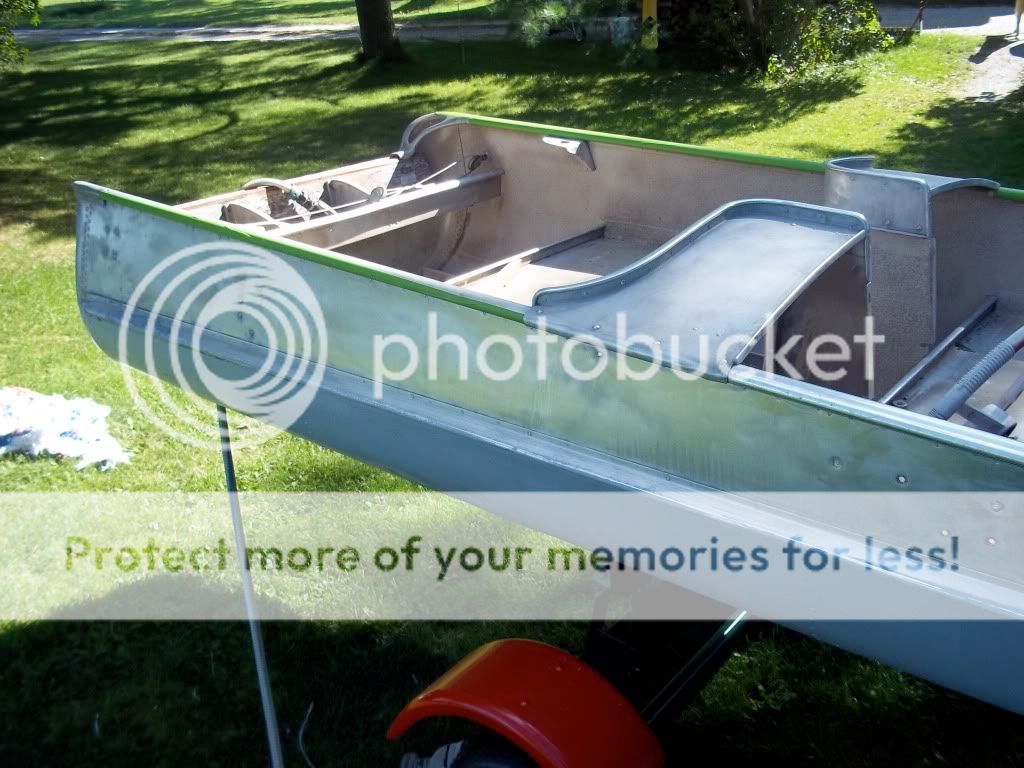
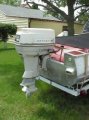
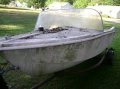
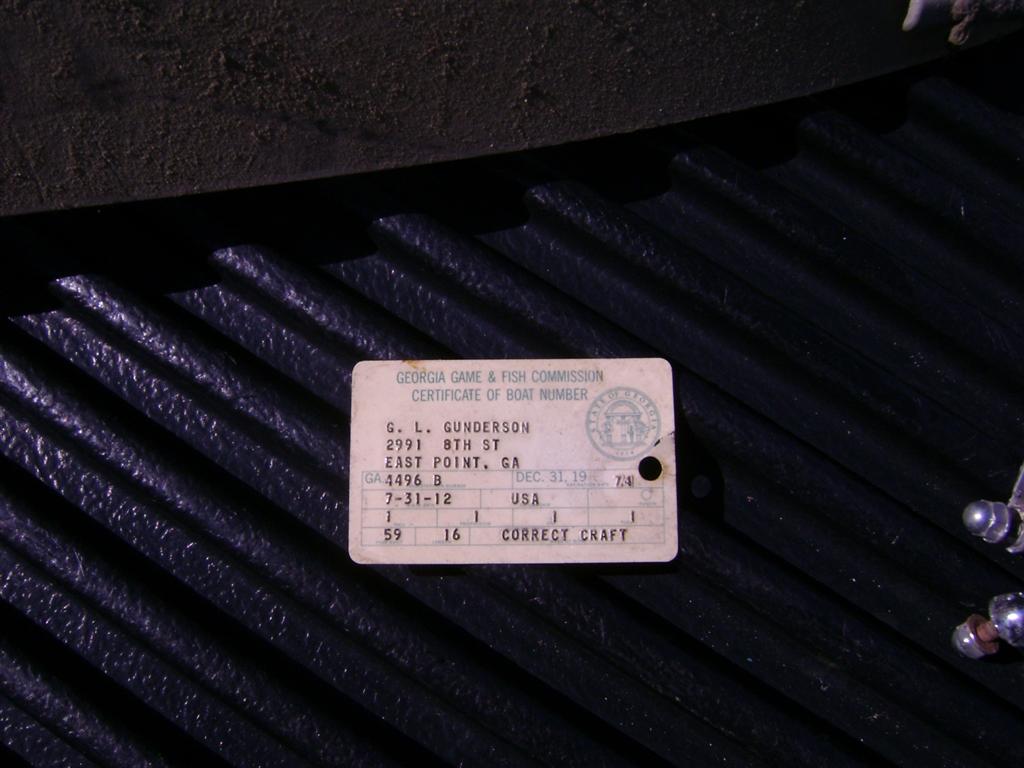
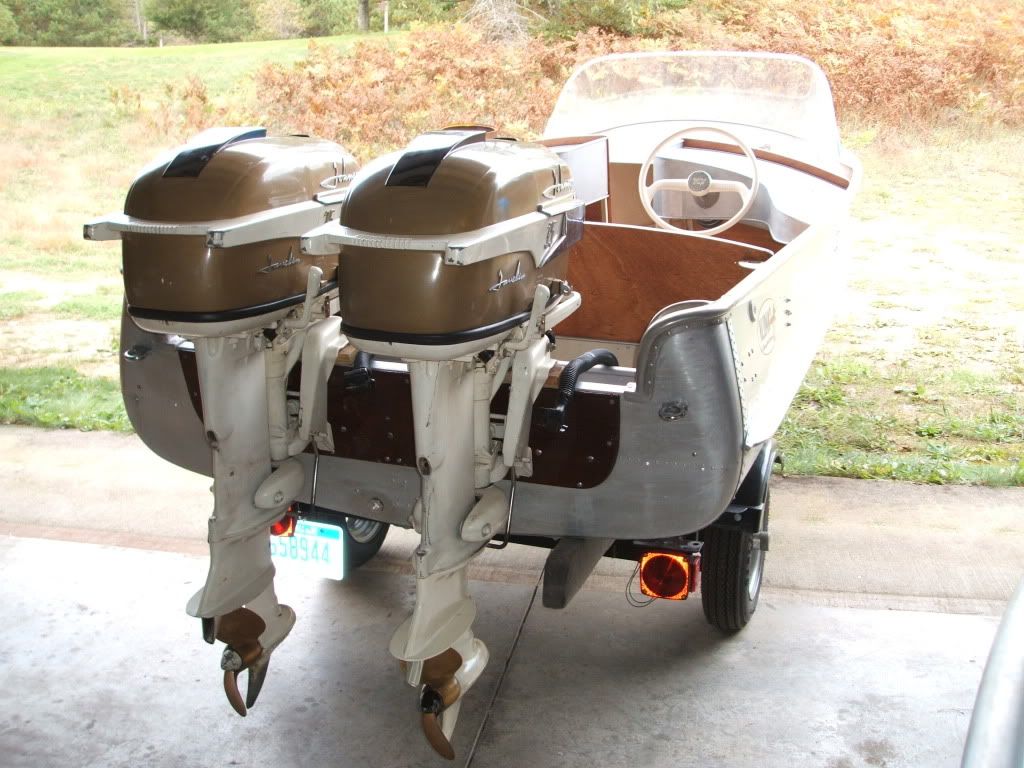
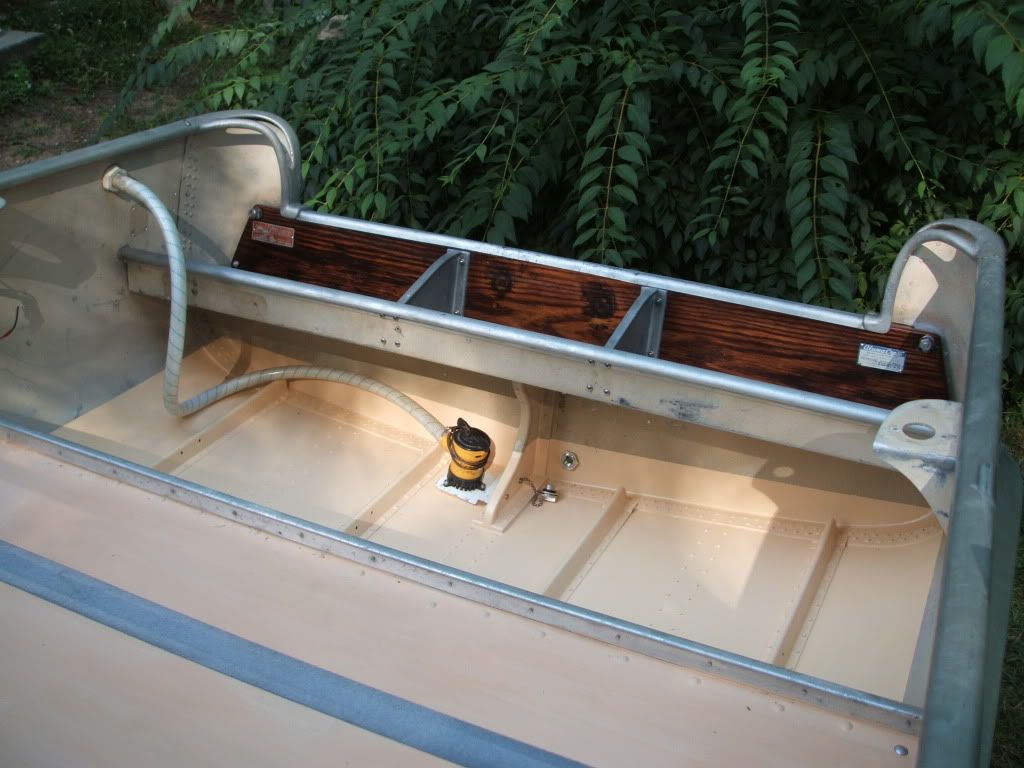
Alumacraft Flying D, transom 13 years 7 months ago #15206

  • davidk
  • Offline
  • Senior Boarder
  • Senior Boarder
  • Posts: 187
  • Karma: 6
  • Thank you received: 5
Has anyone here tried replacing the inside transom wood of an Alumacraft Flying D (or similar model)? Seems like I may have to drill out the rivits of the corner bracket in order to get the board out. I'd hate to do that if I could avoid it, but I can see any other way out.
-David


Please Log in or Create an account to join the conversation.

Re:Alumacraft Flying D, transom 13 years 7 months ago #15248

I think it can be done without drilling out the rivets. My dad recently replaced the inside and outside transom on an FD which would be the same. Let me check how he did it.

Got any more photos? I've got a Flying D myself. Mines yellow and white.

Please Log in or Create an account to join the conversation.

Re:Alumacraft Flying D, transom 13 years 7 months ago #15275

  • davidk
  • Offline
  • Senior Boarder
  • Senior Boarder
  • Posts: 187
  • Karma: 6
  • Thank you received: 5
I'm currently painting the boat, so I've removed the Mark 25, windshield, and seats. I'll post more photos as I make progress. I'd love to see some other Flying D's!

She sits on what I think is a 55 Mastercraft trailer. I got the paint scheme from the library on this site. Funky color scheme. In hindsight, I kind of wish I'd color-matched the trailer to the boat
-David


Please Log in or Create an account to join the conversation.

Re:Alumacraft Flying D, transom 13 years 7 months ago #15293

Talking to my dad, apparently those Aquaduct transom supports had already been taken out on the one he did. He left the corners alone,and was able to slide a 1" board back in. I could take photos, but it'll be while. Great looking flying D, it's gonna look great.

Please Log in or Create an account to join the conversation.

Re:Alumacraft Flying D, transom 13 years 6 months ago #16374

I replaced the transom on an FD this summer. Not only did I drill out the corner bracket rivets (replaced them with round head SS machine screws and nuts), but that damned transom cap that runs across the top of the transom has about thirty little spot welds across the back that I had to break using a putty knife as a chisel. Managed to save everything and it all went back together nice.

Please Log in or Create an account to join the conversation.

Re: Alumacraft Flying D, transom 13 years 6 months ago #16463

When I replaced the transom wood in my DuraCraft, I did it in four pieces that were glued and screwed together in place. I needed 1-1/4" thickness, so I used 3/4" and 1/2" plywood. After cutting both pieces of ply to shape, I ripped 4" off the bottom of the 3/4" ply and 4" off the top of the 1/2" ply so the center joints would be 4" apart. I used waterproof glue and lots of 1" SS screws. No problems 15 years later.
Dave.

Please Log in or Create an account to join the conversation.

Re: Alumacraft Flying D, transom 13 years 6 months ago #16464

When I replaced the transom wood in my DuraCraft, I did it in four pieces that were glued and screwed together in place. I needed 1-1/4" thickness, so I used 3/4" and 1/2" plywood. After cutting both pieces of ply to shape, I ripped 4" off the bottom of the 3/4" ply and 4" off the top of the 1/2" ply so the center joints would be 4" apart. I used waterproof glue and lots of 1" SS screws. No problems 15 years later.
Dave.

Please Log in or Create an account to join the conversation.

Re: Alumacraft Flying D, transom 13 years 6 months ago #16763

  • davidk
  • Offline
  • Senior Boarder
  • Senior Boarder
  • Posts: 187
  • Karma: 6
  • Thank you received: 5
Thanks for the suggestions. It looks like drilling out one of the corners would be the best way to get at that board, but some friends have convinced me to try to leave it in place and try to sand it as best I can. I'm going to try that, and let you know how it goes.

Please Log in or Create an account to join the conversation.

Re:Alumacraft Flying D, transom 13 years 6 months ago #17017

You do NOT have to drill out the corner or top rail to remove the inner transom board and I don't recommend it. But you do have to drill the rivets for the two casted transom braces in front of the board and remove them. Reassemble them with stainless screws and locknuts. With the braces removed the board comes out easily. But there is a small trick to removing (and replacing) the braces after the rivets are out, because they are a snug fit. Easy if you do it right. Impossible if you don't. Use a plastic or wood mallet or similar and knock the front edge of each casted support towards the MIDLINE of the boat until it pops free. Reassemble in opposite direction.

How does one post a photo on this sight?
Lloyd

Please Log in or Create an account to join the conversation.

Re:Alumacraft Flying D, transom 13 years 6 months ago #17026

  • MarkS
  • MarkS's Avatar
  • Offline
  • Moderator
  • Moderator
  • Posts: 5348
  • Karma: 118
  • Thank you received: 5
There are two ways to post pics Lloyd. This first is the "Search image file to attach" button below the text box you're typing in. If the pic is stored on your computer's hard drive you simply click the "Browse" button to locate the pic, double click it, and it will load when you hit the "Submit" button to post your response.

The other way is to highlight the url address of the image from a photobucket or picasa site, hit copy, and click the icon above with the picture of a computer screen with the chain (link)paste the link there. Then insert, submit and it's entered.
Attachments:

Please Log in or Create an account to join the conversation.

Mark

Re:Alumacraft Flying D, transom 13 years 6 months ago #17027

Trying to post a photo.

Please Log in or Create an account to join the conversation.

Re:Alumacraft Flying D, transom 13 years 6 months ago #17030

  • MarkS
  • MarkS's Avatar
  • Offline
  • Moderator
  • Moderator
  • Posts: 5348
  • Karma: 118
  • Thank you received: 5
You did good Lloyd, beautiful pair of twins! You can post multiple pics in one post by immediately going back and editing the post, follow the same process again and hit enter. This can be done as many times as you would like. (We love pics here.)

Please Log in or Create an account to join the conversation.

Mark

Re:Alumacraft Flying D, transom 13 years 6 months ago #17031

Thanks Mark. I tried the second method before I saw your response and it worked. now trying the first method and it is much faster. hope it works.
Lloyd

Please Log in or Create an account to join the conversation.

Re:Alumacraft Flying D, transom 13 years 6 months ago #17032

Trying again.
Can't get the first method to work either directly or by editing this post. Too bad because it takes a long time to down load stuff to a public site and then retrieve them to post them here. I am not a computer geek.

Please Log in or Create an account to join the conversation.

Re:Alumacraft Flying D, transom 13 years 6 months ago #17037

  • MarkS
  • MarkS's Avatar
  • Offline
  • Moderator
  • Moderator
  • Posts: 5348
  • Karma: 118
  • Thank you received: 5
It could be a size issue with the pics Lloyd. The max size is 1024kb, or 2048 x 2048 pixels. There is a good thread in the support section on resizing your pics easily, let me post the link for you:

www.fiberglassics.com/glassic-forums/support/pic-sizing

Please Log in or Create an account to join the conversation.

Mark

Re:Alumacraft Flying D, transom 13 years 6 months ago #17041

Thanks Mark. That's very helpful and I think I understand it now, but I don't want to resize all my images (or any of them for that matter). It's just too time consuming and I don't have that much interest in computers to learn and retain all that stuff. For now I guess I will just stick with storing some on Photobucket and using them. At least I can make that work.

I hope the info on the transom board was useful. Hate to see folks drilling away their spot welded transom caps, etc. when it is not necessary and easier the other way.

Please Log in or Create an account to join the conversation.

Re:Alumacraft Flying D, transom 13 years 6 months ago #17042

Here is a photo of a transom that was redone by removing only the two casted transom supports as described above.
Side note. The bilge pump is not needed as the boat has no leaks, but it was reinstalled because it came that way and possibly may be useful.

Please Log in or Create an account to join the conversation.

Re:Alumacraft Flying D, transom 13 years 6 months ago #17048

  • MarkS
  • MarkS's Avatar
  • Offline
  • Moderator
  • Moderator
  • Posts: 5348
  • Karma: 118
  • Thank you received: 5
I'm sure David appreciates the advise on the trick way to pull of the job much easier. Nice job on yours Lloyd, nice straight and clean interior. Looks great. (I'd leave the bilge pump in there too, better safe than sorry. Even if the boat doesn't leak, you just never know what's going to happen out on the water!)

Please Log in or Create an account to join the conversation.

Mark

Re:Alumacraft Flying D, transom 13 years 6 months ago #17157

  • davidk
  • Offline
  • Senior Boarder
  • Senior Boarder
  • Posts: 187
  • Karma: 6
  • Thank you received: 5
I DO appreciate the suggestion! Thanks, Lloyd! I'll have to look at those brackets and reassess. It would be way better to get that board out to refinish it. I wish I had considered this before prying off that pesky top cap.

Hey, what color did you use for the interior? I picked up a few cans of Valspar Santa Fe Sand, a textured spray paint I found at Lowes.
-David

Please Log in or Create an account to join the conversation.

Re:Alumacraft Flying D, transom 13 years 6 months ago #17211

Most of my interior paint is original. I only painted the rear floor for durability. I used a white two part epoxy (Interlux) that I tinted with PPG colors.
When you remove the inner transom board (and outer board) you will notice that they have a 1/16 thick cork gasket behind them that you can probably reuse. If you need to replace the cork gasket you can get it in rolls from auto supply stores and or some craft stores. They are much easier to refinish when removed from the boat as you can guess and you will get a much better result because you can seal the wood on both sides. Just remove the two upper transom supports from the Aqueduct transom as described above. It's easy.

Please Log in or Create an account to join the conversation.

Re:Alumacraft Flying D, transom 13 years 6 months ago #17240

  • davidk
  • Offline
  • Senior Boarder
  • Senior Boarder
  • Posts: 187
  • Karma: 6
  • Thank you received: 5
Dang! I just looked at my boat and there are 24 rivits holding in the transom brackets and only 7 holding on the corner bracket. Why is it better to remove the transom braces?
-David

Please Log in or Create an account to join the conversation.

Re:Alumacraft Flying D, transom 13 years 6 months ago #17269

Looks like Lloyd's is a Flying C. Not having either of my C's in front of me, I couldn't say exactly how the transom differs from the FD (or Flying D)

BTW - for those of you over Wisconsin way, there's a nice Flying C on ebay right now, for a song.


search:

1960 Alumacraft Flying C
Vintage 1960's Alumacraft Runabout Rhinelander WI

Please Log in or Create an account to join the conversation.

Re:Alumacraft Flying D, transom 13 years 6 months ago #17317

that is a nice flying c. was on craiglist for even less before going on ebay.

Please Log in or Create an account to join the conversation.

Re:Alumacraft Flying D, transom 13 years 6 months ago #17573

The FD and Deep C transoms are virtually identical. The Deep C just has higher sides.

The main reason it is better to remove the transom braces instead of the corner braces is because even if you remove the corner braces you can't get the board out unless you destroy the spot welds (and top aluminum cover) to remove the aluminum cover. It is welded on for a reason and making a new top aluminum cover is a lot harder than drilling out the transom brace rivets. And how will you reattach the top aluminum cover if you remove it? It is also quicker to drill out the transom brace rivets than it is to destroy the spot welds(and safer). Also if you remove the corner braces you will have to rivet them back on with the proper rivets if you want it to look right. Sooo... if you ever need to remove the board again, you have to drill them out again. Once you remove the transom braces and replace the rivets with screws, it is relatively easy to remove them in the future without damaging anything.

Please Log in or Create an account to join the conversation.

  • Page:
  • 1
Time to create page: 0.254 seconds

Donate

Please consider supporting our efforts.

FG Login

Glassified Ads

FiberGoogle

Who's Online

We have 7856 guests and 2 members online