Welcome, Guest
Username: Password: Remember me

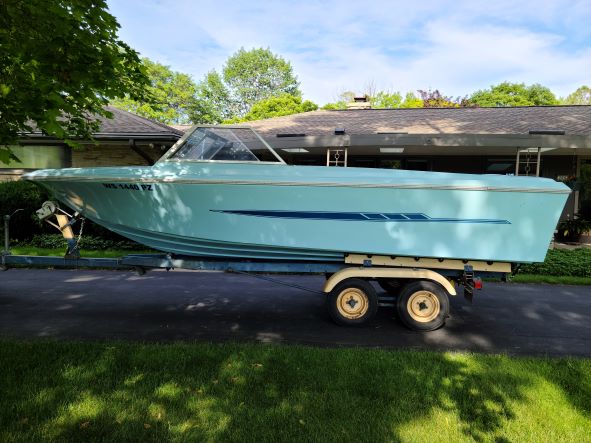
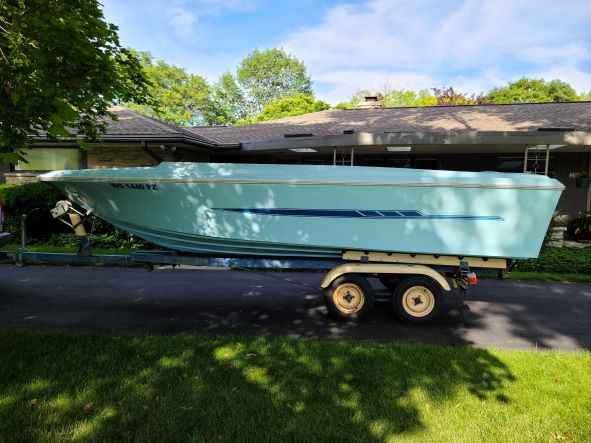
TOPIC: 1971 Glasspar Newport Cruiser - Rejuvenation

1971 Glasspar Newport Cruiser - Rejuvenation 1 year 9 months ago #146699

  • Larsspar
  • Larsspar's Avatar Topic Author
  • Offline
  • Senior Boarder
  • Senior Boarder
  • Posts: 194
  • Karma: 3
  • Thank you received: 17
Stock compression was 9:1 using a dished piston. My goal is to keep the compression ratio between 9:1 and 9.5:1 to ensure I can fill up at marinas if required.

I intend on keeping the ignition system simple for reliability reasons. I'd like to keep the stock 'on intake manifold ignition coil' and ignition distributor. The stock points and condensor configuration will be replaced with a PerTronix module. I did consider an MSD Marine setup, but it adds additional potential points of failure. The stock ignition with the PerTonix upgrade should be able to support the desired compression ratio without problem. I'll also change the distributor drive gear to match the materials the new camshaft is made out of.


Only spare parts required for a long cruise are Coil, Cap/Rotor and an extra PerTronix module. (and perhaps fuel pump parts)
Attachments:

Please Log in or Create an account to join the conversation.

1971 Glasspar Newport Cruiser - Rejuvenation 1 year 9 months ago #146754

  • Larsspar
  • Larsspar's Avatar Topic Author
  • Offline
  • Senior Boarder
  • Senior Boarder
  • Posts: 194
  • Karma: 3
  • Thank you received: 17
Finally completed cleanup/restoration on the Cockpit Windscreen. It proved to be a bigger undertaking than originally expected.


Each window uses a two piece seal system.

I did a fair amount of online research but didn't come across anything remotely similar to this setup as potential replacement.
So, I had to cleanup/restore the original components. The frames and seals were fairly filthy with the exterior seals covered in sap, mold and remnants of old treatments.


First, I separated the seals from the frames and removed the glass and plexiglass. Was surprised to find the curved cut glass, used to fit the slight crown of the cabin roof. Was very careful with it as getting a PPG replacement is likely nearly impossible.


The seals were initially soaked and scrubbed in a Mr. Clean bath. I then placed them in a bucket of 30/70 bleach/water mix for several days each.


This killed the mold, but I still had a thick film on much of the exterior seals


I tried several techniques to remove the scale (wire brush, plastic scraper, wire wheel, sand paper) and finally found luck with a small paint scraper. Aggressive, I know, but I carefully scraped the scale off without marring the seal face itself.


Once complete, I still had a dull surface with small scale remnants remaining. I tried experimenting with paint thinner, turpentine, Methyl Ethyl Ketone and Acetone to get a finished product. Heavy gloves, Acetone and fine steel wool proved to do the trick, with some elbow grease. As shown in the 2nd picture above, the finished product turned out very well.


Once the seals were complete, I turned my attention to the window frames, glass and windshield wiper motor and switch. I also decided to restore another old machine in the process.

Please Log in or Create an account to join the conversation.

1971 Glasspar Newport Cruiser - Rejuvenation 1 year 9 months ago #146755

  • Dr.Go!
  • Dr.Go!'s Avatar
  • Offline
  • Contributing Member
  • Contributing Member
  • Posts: 1719
  • Karma: 19
  • Thank you received: 125
Looks like it turned out that hard work, lots of thinking and determination won this stubborn battle. great work. Sometimes it seems the harder the challenge, the more rewarding the result. Love that boat color! It would be cool to see it in person if you felt like dragging it up north to that Minocqua boat show on the 17th and 18th... just a wishful hint.
The following user(s) said Thank You: Larsspar

Please Log in or Create an account to join the conversation.

Dr.Go!

1971 Glasspar Newport Cruiser - Rejuvenation 1 year 9 months ago #146759

  • Larsspar
  • Larsspar's Avatar Topic Author
  • Offline
  • Senior Boarder
  • Senior Boarder
  • Posts: 194
  • Karma: 3
  • Thank you received: 17
Thanks for the encouraging words, Doctor. I would love to attend Minocqua and will definitely in the future. It's just not in the cards this year. Heck, after Minocqua, I'll likely head up to Eagle River and the chain of lakes there.....perhaps brave the Burnt Rollways Boat Hoist. Used to visit a friend’s cottage on Cranberry Lake a couple times each summer.

Continuing on our journey to reach that day, I next turned my attention to windshield frames.


After giving the frames a good cleaning in a Mr. Clean bath with a rinse and dry, I took a detour and decided to return this 1950s buffing machine back to service. I traded my Brother-in-law a nice tool stand for this. He likely came out ahead, but I admittedly felt like this orphan needed a home.


I sand blasted all the castings and wire wheeled all the hardware and then finally primed and painted with Rustoleum Smoke Grey.


The original Craftsman 1/2hp electric motor was disassembled, thoroughly cleaned, and rewired where necessary. The castings were sand blasted and painted, and it was treated to new bearings, overload switch and starter capacitor. Ran like a top......

Sadly though, once the machine was put into service and placed under load, the motor would overheat quickly. I believe one of the windings was failing, So, I had a spare motor from my old 14" band saw that I fit to the buffing machine, and after some modification of the engine mount and motor shaft, had a fully operational buffing machine.


The machine is bolted to two concrete anchors, placed in the floor.

Placed an order with Caswell for various buffing wheels and compound and finally got to work buffing the aluminum window frames.


I used two stages/compounds and two buffing wheels to polish the frames. I learned a fair amount, while admittedly losing control of my parts two or three times lead to contact with the buffing wheel shaft and sadly small mars in my frames. The large frame was unwieldy and likely should have been clamped down and hand polished. My goal was to just clean the frames up nicely, so I fell short of the mirror finish produced by eperot on his Seafair fittings. Here's one sneak peak of the finished results.


Next we'll move on to the glass, wiper motor and final assembly

Please Log in or Create an account to join the conversation.

1971 Glasspar Newport Cruiser - Rejuvenation 1 year 9 months ago #146764

  • Larsspar
  • Larsspar's Avatar Topic Author
  • Offline
  • Senior Boarder
  • Senior Boarder
  • Posts: 194
  • Karma: 3
  • Thank you received: 17
Moving on to complete the Cockpit Windscreen. I needed to clean up the glass and restore the windshield wiper motor.

When I separated the seals, glass, and frames, I found the glass was caked with dirt and had abrasions along the sealing surfaces. The glass also had a fair amount of mineral deposits on it, likely generated during the last couple years of outdoor storage.


I purchased some glass polishing compound on amazon and put it to work after giving the glass a good cleaning with soap and water.


The orange compound was slightly more aggressive than the white.

I took a spray bottle filled with distilled water and spritzed the glass. Then I sprinkled the compound on the glass and using an automotive polisher with a foam polish wheel, worked the compound into a thin paste. I then made multiple passes sided to side and top to bottom until the paste eventually dried, turned to dust, and vanished.


The polish did an amazing job removing the abrasions and mineral deposits. If you have scratches that you must remove, you will have to start with something more aggressive. I have a couple very minor scratches and this system did improve/almost hide their appearance, but it did not remove them.

I can clearly see the PPG manufacturing label now.


Next, I laid the inner seals back in their places, and applied sealant to the corners where gaps existed. They were originally cut this way which points to some of the lesser effort put into fit and finish. Finally, I laid the glass on the inner seals and pressed the outer seals in place.


The two side windows are plexiglass. I'm looking into having them replaced with safety glass. Do any of you have experience with this procurement process?

Please Log in or Create an account to join the conversation.

1971 Glasspar Newport Cruiser - Rejuvenation 1 year 9 months ago #146765

  • Larsspar
  • Larsspar's Avatar Topic Author
  • Offline
  • Senior Boarder
  • Senior Boarder
  • Posts: 194
  • Karma: 3
  • Thank you received: 17
Last step in the Cockpit Windshield was to restore the windshield wiper motor and switch.


As shown in a previous update, I removed the back cover of the switch, cleaned the internals and put some dielectric grease on the friction points.

I disassembled the wiper motor and gave the parts a good cleaning. (while taking a number of pictures to document assembly)


One of the power leads required some soldering.

Studying the internal components which looked pretty good, I'd guess the motor hasn't seen much use in 51 years of service.
I reassembled, initially with some lithium grease as shown, but eventually felt it was too light, based on the heat the motor generates when I bench tested it over a 30-minute period. I ended up cleaning it again and used a high pressure/high temperature grease.

To bench test, I hooked up the switch, and motor to a battery. I initially struggle to get my head around the proper way to wire the motor, which is a single speed version. The positive lead goes directly from the power source to the motor. (I kept thinking the positive lead had to be a switched source) Instead, two negative leads go to the motor. One lead is switched, and one lead goes directly to the power source. The reason for this is the switched negative lead starts and stops the motor, while the direct negative lead is meant to park the wiper when turned off.


Despite working on the motor internal breaker to get it aligned properly, the park feature still doesn't work very well. The motor seems too weak to complete the park process, as if it's not getting enough power.

I completed the project by polishing the cover and installing it in the windshield.


Once installed, I didn't like how far the wiper motor shaft extended from the windshield, so using a cutoff wheel, I removed a 1/4 inch.


The wiper arm itself is a bit of a story. It is spoon shaped and after a lot of searching, I found a 1955 Chevrolet wiper blade worked with the spoon mechanism and at 11 inches was perfect for the windshield

Please Log in or Create an account to join the conversation.

1971 Glasspar Newport Cruiser - Rejuvenation 1 year 8 months ago #146786

  • Larsspar
  • Larsspar's Avatar Topic Author
  • Offline
  • Senior Boarder
  • Senior Boarder
  • Posts: 194
  • Karma: 3
  • Thank you received: 17
I too am glad Fiberglassics is back and not lost forever. Thank you Ken!

Throughout the last several months, I have been disassembling and cataloging the 215E outdrive.


This eBay find for $21 which included shipping, has been indispensable in the careful disassembly of the drive. Also, gives me confidence I have the details (along with my pictures) to reassemble the drive, once refinished.


The drive itself is likely a little simpler than its descendants. The shift mechanism is on top and it contains no raw water pump. The raw water pump is on the front of the engine, under the alternator. It gets its raw water supply from this through transom fitting.

I wonder if the fitting creates enough drag to cost me a knot or two??

I started by removing the gimbal housing/bell housing and lift cylinders.


The bell housing proved fairly easy, with the two fasteners hiding under the trim sensors. (After I carefully loosened both bellows)
This simplified the assemblies down to the inner transom and outer gimble plates.


Removing 8 nuts/washers allowed me to separate the inner transom plate and carefully tap the exterior gimble housing studs through the transom with a block of wood.

Once apart I was able to clean and strip the assemblies in my shop.


The most challenging part of this phase was removing he gimble ring/swivels from the gimble housing. Once I devised a way to connect a slide hammer to both upper and lower swivels, it came apart fairly easily. I thought I got pictures, but apparently not.


I believe Mercruiser likely used a form of thread lock when assembling these drives. A little heat on each stud boss made it fairly easy to remove each of the studs.

Each component was stripped of all fittings and fasteners. Each will be media blasted and repainted prior to reassembly.

Please Log in or Create an account to join the conversation.

1971 Glasspar Newport Cruiser - Rejuvenation 1 year 8 months ago #146794

Man, I am constantly impressed with the thoroughness of your work. Well done on the windshield...and as far as the mirror like finish I have achieved, it's likely due to me totally removing the protective anodize layer applied from the factory, which your windshield surround appears to still have. It may come back to bite me in the ass one day, especially in a salt water environment. Of course, by the time I have this boat in the water, I hope to have a lot more time on my hands to while away a few hours at the marina with metal polish to keep it bright!
Eric
The following user(s) said Thank You: Larsspar

Please Log in or Create an account to join the conversation.

1971 Glasspar Newport Cruiser - Rejuvenation 1 year 8 months ago #146803

  • Larsspar
  • Larsspar's Avatar Topic Author
  • Offline
  • Senior Boarder
  • Senior Boarder
  • Posts: 194
  • Karma: 3
  • Thank you received: 17
Disassembly of the drive started in a freezing cold garage last January. Using a furniture dolly as a base, I created a cart matched to my drive as previously engineered by others I viewed on the internet. I transferred the drive from my engine hoist to the drive cart. This worked well as it gave me ample room to disassemble and split the upper and lower units.


I started by removing the top and rear covers from the upper drive, which are held in place by large 4 Phillips screws each. Using the service manual to gauge order, I first removed the engine to drive, drive shaft by loosening a large nut at the rear of the case.


I was then able to remove the front cover assembly which contains an oil control valve and part of the shifting mechanism, by loosening 4 socket head screws.


This then fully exposed the forward and reverse gears plus the shift mechanism. I have the say the gears, roller bearings they ride on, and the sliding clutches all are large and very robust. All components show little sign of wear.


Next, I was able to loosen two screws that support the clutch fork and remove the assembly.


Finally, I was able to remove the forward and reverse gears which only left the vertical drive shaft/pinion gear in place.

7 studs/nuts and one socket head bolt hiding under the lower unit trim fin at the rear of the drive, were removed next which allowed me to split the upper and lower cases. I was disappointed to see some heavy chisel marks along the joint that splits the upper and lower cases. I'm guessing a previous technician didn't understand the socket head bolt was hiding under the trim tab and likely tried to use a chisel to drive the castings apart. I'll have to use some aluminum epoxy to restore the mating surfaces.


This left the lower unit on the cart.

Please Log in or Create an account to join the conversation.

1971 Glasspar Newport Cruiser - Rejuvenation 1 year 8 months ago #146804

  • Larsspar
  • Larsspar's Avatar Topic Author
  • Offline
  • Senior Boarder
  • Senior Boarder
  • Posts: 194
  • Karma: 3
  • Thank you received: 17
With the upper assembly removed, I was able to take lift the lower assembly out of the cart and carry it into the house and downstairs to my work shop. As you can see, the skeg has taken quite a shot at some point, so I knew repair would be required. I just didn't understand how much yet.

I clamped the skeg into a vise and began to work on disassembly.


First step was to remove the retaining nut for the bearing carrier assembly.


This took some extra tooling on my part. Over the course of a couple evenings, I applied penetrating oil and a little heat around the casing, but I wasn't able to get it to budge. Additionally, my 1/2" impact wrench wasn't having much luck either. I long suspected the air supply to the 1/2" impact wasn't enough through 3/8" air hose and 1/4" air fittings, so I plumbed in 1/2" pipe and 3/8" air fittings and purchased a 25' length of 1/2" air hose.


This did the trick, along with a small amount of heat. The retainer came out nicely with all threads intact.


Next, using a slide hammer and a little heat, the bearing carrier came out fairly easily.


Then I got stuck. There is a nut on the lower pinion gear of the vertical drive shaft that is torqued on tight. (number 9 in the illustration)


The service manual recommends use of the Mercruiser 'torque tool' is MC 91-48606 which is no longer available, and I was not able to find a used one on the web. The vertical shaft is 17 spline 1 1/8". I sought help on this and other Mercruiser sites, with little response. One enthusiast recommended slaving two nuts together. Great idea, but these nuts are not readily available at the local hardware store. Finally gave in and sent a small bundle of money to Marine Engine and purchase two drive gears nuts. (Apparently the last in stock)


By placing two nuts on top of the vertical drive shaft along with a socket and breaker bar and box wrench on the lower end, I was able to get the nut to break loose and slowly come off. This will be the most difficult part of the re-assembly, because this nut needs to be torqued to a specific setting to ensure proper clearance between the drive gears.

Once that was removed, I was able to slide hammer prop shaft drive gear bearing race out and remove the prop shaft drive gear. Behind the prop shaft drive gear, I found the horrors of a pretty big repair. It seems the bearing carrier casting was previously smashed pretty hard, creating a large hole that was welded up with two patches.


I'll have to media blast the casting and assess the quality of the repair to determine next steps.

Finally, everything was given an initial clean, cataloged and placed in storage.


All the castings will be media blasted and painted prior to reassembly. Additionally, I'll investigate getting the drive decals replicated.

Please Log in or Create an account to join the conversation.

1971 Glasspar Newport Cruiser - Rejuvenation 1 year 8 months ago #146837

  • Larsspar
  • Larsspar's Avatar Topic Author
  • Offline
  • Senior Boarder
  • Senior Boarder
  • Posts: 194
  • Karma: 3
  • Thank you received: 17
After completing the Drive disassembly, I decided to break up the mechanical work and create some boat furniture. This woodworking exercise will help move me into the trailer restoration phase.

Oh....when I said boat furniture, I meant horses the boat can rest on. (I'm admittedly proud of this beauty shot!!)


Started by taping a piece of Rosen paper to the transom of the boat and used a crayon to score the outline of the bottom of the boat’s stern.


I then proceeded to mill some old 4 x 4 (Nominally 3 1/2 x 3 1/2) lumber I reclaimed from a firewood seasoning rack I previously built and some 2x4's (Nominally 3 1/2 by 1 3/4) and 2x8's (Nominally 7 1/4 x 1 3/4) purchased at The Home Depot (glad lumber prices have dropped through the floor)

First, cut all boards to desired length using the Turret Saw (some believe these to be Widow Makers)


Started the dimensioning process at the jointer and squared two sides 90 degrees to one another.


Moved on to the thickness planer.


Finished the process with 3 x 3's, 1 1/2 x 3's, and 1 1/2 x 7's. (all boards completely square)


Next, used the Turret Saw with a Dado stack to create some dados in the 3 x 3 boards to make strong joints.


Glued some of the boards together for added strength and to ensure tight joints.


Used the band saw to round off the corners of the feet and create ellipses for the keel to rest on.


Project continues on the next post

Please Log in or Create an account to join the conversation.

1971 Glasspar Newport Cruiser - Rejuvenation 1 year 8 months ago #146838

  • Larsspar
  • Larsspar's Avatar Topic Author
  • Offline
  • Senior Boarder
  • Senior Boarder
  • Posts: 194
  • Karma: 3
  • Thank you received: 17
I took couple of 8 x 12 sheets of craft leather and cut a series 6 x 6, 3 x 6, and 3 x 3 pieces, to use as pads between the hull and the horses.


Using 3M Spray Bond, I attached and layered the leather pieces to the four support points on the horses. I used extra pieces to shim the support point of the keel on the stern horse, as my woodworking dimensions and skills left me short by ~1/4".


All edges were relieved using a trim router and an 1/8" round over bit and 3/8" pilot holes were drilled in some of the boards using the drill press. All joints (glued or un-glued) were tied together using 3/8" galvanized carriage bolts.


The lower sections of the stern horse were assembled on the flattest portion of my garage floor I could find.


The horizontal upper boards were fitted with the stern of the boat resting on the veritcal posts. This allowed to me to fine tune the Rosen paper markings I created earlier. I used a jig saw to notch reliefs for the strakes and used the table saw to crosscut the horizontal 1 1/2 x 7's.


Tight fit of the joint that forms at the keel post is critical to ensuring lateral rigidity. (Red circle)

The bow keel horse (made up of four 3 x 3’s glued together) was assembled in a similar manner, using my worktable to ensure square assembly of the feet.


Perhpas a little over engineered..............

Please Log in or Create an account to join the conversation.

1971 Glasspar Newport Cruiser - Rejuvenation 1 year 8 months ago #146839

  • Larsspar
  • Larsspar's Avatar Topic Author
  • Offline
  • Senior Boarder
  • Senior Boarder
  • Posts: 194
  • Karma: 3
  • Thank you received: 17
Did a test load in the driveway at home.

With the trailer wheels chocked, I loosened the load strap 18" and rolled the boat slightly back on the trailer. I then lowered the trailer tong as close to the driveway as the trailer jack would allow. This tilted the stern up just high enough that I could slide the stern horse under the boat.

Next, I used the trailer jack to lift the tongue of the trailer several inches above the trailer level point.

Using a lifting strap shackled to the bow lifting eye and my engine hoist, I was able to lift the bow of the boat off the trailer.
The strap kept the shackle off the boat, so no marring occurred.


I used the trailer jack to lower the trailer tongue to level with the rest of the trailer. I was then able to walk the trailer forward to a point where the trailer wheels touched the engine hoist with little more than finger tension. I then had plenty of room to place the bow keel horse in place.


I disconnected the engine hoist and moved it out of the way.
Finally, I moved the trailer completely away from the boat and was able to thoroughly inspect the hull for the first time. The hull looks great!


Now I have to replicate the same process in its 10 x 25 storage locker.

I can then begin trailer restoration!

Please Log in or Create an account to join the conversation.

1971 Glasspar Newport Cruiser - Rejuvenation 1 year 8 months ago #146849

  • Larsspar
  • Larsspar's Avatar Topic Author
  • Offline
  • Senior Boarder
  • Senior Boarder
  • Posts: 194
  • Karma: 3
  • Thank you received: 17
Before placing the hull in storage, I wanted to do one last thing.

I started by cutting a five-foot length of 2 x 4. I notched a couple reliefs in one edge 3 feet apart and drilled it for a 3/8" x 2 1/2" lifting eye bolt. I wanted the eye bolt to be shorter than the width of the 2 x 4, so I could recess the washer and nut, thus avoiding possible scratches to the boat. This, along with my 'come along winch', became my 'block and tackle' for cabin roof removal.


To my wife's dismay, I took down the kid's swings in the back yard and backed the trailer/boat under the tree limb.


Using the upper portions of the swing chains, I created a chain loop for the winch to hang from. I hooked to lower portion of the winch to the 2 x 4 eye bolt. I had to remove 3 nuts/washers on both the Port and Starboard sides of the roof along with 12 screws tying the roof to the window frames. Once removed, I was able to slightly lift the roof off the front wind screen enough to pass straps through. The straps were then looped over the tackle and cinched. Then, I used the winch to lift the roof off the boat.


Once clear, I pulled the trailer/boat out and moved it back on the driveway, leaving the roof to hang.


I cut six short pieces of vinyl tubing and slid them of the studs that are glassed into the roof, and then lowered the roof to the ground. I flipped the roof on its top onto a tarp and dragged it up to the house.


I'll wrap it in a couple moving blankets and place it in storage.

My Newport Cruiser now looked like a Sealiner.


With the help of one of my children, I was able to unbolt and unscrew the windows and windscreen and remove. Plan is to disassemble the windows, and clean and restore the seals. I'd also like to replace some of the plexiglass with Tempered glass. I’ll also hunt down similar double-sided grey sealing tape to replace the originals.


On closer inspection, I may have to visit my old friend Russ again. It appears the reliefs cut into the deck by the factory for the helm mechanicals may have gotten carried away. The entire deck was compromised. :dry:


Interested in your thoughts. I believe I need to shore this up!

Tomorrow, I'll give the hull a good wash and perhaps wax and then into the storage locker and onto its horses it goes.

Time to focus on the trailer resto and the stripping and painting of engine and drive parts.

Please Log in or Create an account to join the conversation.

1971 Glasspar Newport Cruiser - Rejuvenation 1 year 8 months ago #146856

Wow!! Definitely over-engineered, that being said, you surely won’t loose any sleep wondering how the boat will be sitting in the storage unit. It will absolutely be sitting secure. That is one helluva shop you have. It’s easy to see how things can get over-engineered. Show off, lol. That hole looks pretty big but hard to say how important it would be to close it up from that picture. By the looks of the work you’ve done so far I’m sure you will do more than what’s necessary. Keep up the good work, I’m really enjoying this resto thread.
Chris
The following user(s) said Thank You: Larsspar

Please Log in or Create an account to join the conversation.

1971 Glasspar Newport Cruiser - Rejuvenation 1 year 7 months ago #146864

  • Dr.Go!
  • Dr.Go!'s Avatar
  • Offline
  • Contributing Member
  • Contributing Member
  • Posts: 1719
  • Karma: 19
  • Thank you received: 125
Ditto - you do very fine engineering and follow-up skilled work. Secure for sure. I am also enjoying this resto and always helpful to see how challenges are thought through and resolved for progress. That boat hull is so nice, and cradles are so well built and so secure, you could display it in a boat museum over winter and avoid the storage lol.
The following user(s) said Thank You: Larsspar

Please Log in or Create an account to join the conversation.

Dr.Go!

1971 Glasspar Newport Cruiser - Rejuvenation 1 year 7 months ago #146865

  • Larsspar
  • Larsspar's Avatar Topic Author
  • Offline
  • Senior Boarder
  • Senior Boarder
  • Posts: 194
  • Karma: 3
  • Thank you received: 17
Thanks for the kind words, Chris. Happy to have you continue on the journey with me, and please provide any thoughts you have as they come to mind.

I've been collecting tools for 40 years. I admittedly purchased my Jet Cabinet Saw and Dust Collector new ~20 years ago. All the rest are other people’s castaways that I purchased for a little more than scrap value and stripped, blasted, sanded, welded, painted, and refurbished them. Used Craigslist to find the old tools, mainly around the Midwest and eBay for parts. Over time I've come to appreciate old Delta tools from the 50's through 80's. They were built so well, and the electric motors have always responded well to a good cleaning and new bearings. My air compressor is a 1959 Champion. (with a modern motor) I've probably spent more time refurbishing all the tools than using them to date. I trying to flip that ratio.

My shop is in a corner of my basement and is only 12 x 15. I live in a ranch home, so the basement is the same footprint as the house. The tools made their way down in pieces and will have to leave the same way some day. Much of the lumber comes in through a small window. Several of the tools are on carts I made from hardwood, which allows me to move them in and out of the shop as they're needed. Any large assemblies must be completed in the garage.

A quick update: Successfully placed the boat on horses in the storage locker.


Used the empty boat trailer to carefully transport the cabin roof to the storage locker also.


Next step is to break down the trailer. I want it to look as good as Doctor Go's trailer.

Plans include:
  • Keep as original as possible
  • Weld a damage component or two
  • Powder Coating to original colors
  • Salvage original hardware and replate with Zinc
  • Upgrade the wiring harness
  • Install LED bulbs
  • Figure out how to turn tongue into two piece sleave style to save storage space (2 foot section) I'd love to find a four foot section of rectangular tubing that would slide nicely inside the existing 2" x 3" trailer frame. Have any of you attempted this modification? How did you find the materials?
    Attachments:

    Please Log in or Create an account to join the conversation.

    1971 Glasspar Newport Cruiser - Rejuvenation 1 year 7 months ago #146866

    • Larsspar
    • Larsspar's Avatar Topic Author
    • Offline
    • Senior Boarder
    • Senior Boarder
    • Posts: 194
    • Karma: 3
    • Thank you received: 17
    Thanks again Doctor.

    You've help give me a goal to try and be complete by next year's Minocqua show, so I can meet you in person!

    Please Log in or Create an account to join the conversation.

    1971 Glasspar Newport Cruiser - Rejuvenation 1 year 7 months ago #146872

    • Dr.Go!
    • Dr.Go!'s Avatar
    • Offline
    • Contributing Member
    • Contributing Member
    • Posts: 1719
    • Karma: 19
    • Thank you received: 125
    That would be great to see that beauty next year in Minocqua. I plan on going each year that I can. It would be great to meet you and learn more about everything we see here. I have seen the folding trailer tongues and mechanism that can be purchased to make one. I have not see a telescopic one that perhaps could work with double quick pins, but I am no structural engineer. I assume the old adage of over engineering could work here. Wonder if a person could fasten some HDPE to too and bottom of tube with just the right amount of somewhat snug dimensions to allow the sliding in and out of tube without scratching paint and prevent rust inside trying to seize it up. Great thread and great work you are sharing.

    Please Log in or Create an account to join the conversation.

    Dr.Go!

    1971 Glasspar Newport Cruiser - Rejuvenation 1 year 7 months ago #146877

    • Larsspar
    • Larsspar's Avatar Topic Author
    • Offline
    • Senior Boarder
    • Senior Boarder
    • Posts: 194
    • Karma: 3
    • Thank you received: 17
    I appreciate the thoughts Dr. Interesting idea related to HDPE. I'll look into it further. Another option is to weld thinner steel pads on in strategic places to take up any slack.

    I have studied the swing away hinges. They look sturdy, but also perhaps clunky with the robust fittings and extended safety chains. The Holsclaw trailer I have, has a 2" x 3" rectangular tube frame. My 'big idea' is to cut the frame 2 feet from the tongue using a chop saw.


    I will purchase a 48" piece of 1 1/2" x 2 1/2" steel to slide inside the existing boat frame. I'll likely weld and bolt 24" of the 1 1/2" x 2 1/2" steel to the tongue portion of the frame and place pins or bolts it to the roller side of the frame. Still not sure how I'll manage the wiring. My hope is to keep a fairly clean and original look while have the flexibility to remove 2 feet from the trailer when storing. Of course I have to complete this modification prior to powder coating.

    In anticipation of having electric brakes on the trailer, I needed to add a brake controller to my tow vehicle. (Nissan Frontier 4.0/Automatic/FWD with factory tow package) After some research, I decided I liked the clean look and convenience of the Curt Spectrum 51170. Additionally, I was able to purchase a factory style wire harness that plugged the Curt brake controller directly into an unused and waiting Nissan wire harness plug, which is under the steering column. Clean and simple!

    The first challenge was to determine where to install the control knob itself. I considered several areas and ended up choosing one that allows me to keep my eyes on the road while being able to monitor the control knob.


    I then proceeded to disassemble the dash to determine hollow places I could mount the control knob and a place under the dash I could mount the brain box. (YouTube was very helpful here)


    I found an unused mount point under the steering column where I could mount the brain box, and created a bracket out of some 1/8" flat steel.


    It fits securely, and is near the Factory harness connector and the control knob. (sorry for the blurry pic)


    The most breath taking part of the project was removing the center console face and drilling it for the control knob. I checked and re-checked several times before drilling.


    Ended up turning out pretty nicely.


    The ease of function is the selling point for this style of controller. By pushing the knob, the controller changes between several modes, related to LED color, brightness, manual control and automatic brake actuation. To set the automatic brake actuation, you make a series of stops to gauge intensity. If you want increase stopping power, turn knob to the right, decrease to the left. The LEDs on the knob change from green, to yellow, to red based on intensity. Once happy, push the knob to return to monitoring mode. That simple. In an emergency, the knob can be switched to manual mode to control the trailer independently of the tow vehicle brakes.

    Please Log in or Create an account to join the conversation.

    1971 Glasspar Newport Cruiser - Rejuvenation 1 year 7 months ago #146896

    • Dr.Go!
    • Dr.Go!'s Avatar
    • Offline
    • Contributing Member
    • Contributing Member
    • Posts: 1719
    • Karma: 19
    • Thank you received: 125
    Very nice on the brake features and installation! Regarding figuring out trailer wiring with the telescopic idea… it made me thin of the type of tight coil type cable jacketed multi- conductor cable like you see on commercial building motorized garage doors the straighten when stretched and recoil themselves when allowed to relax. I wonder if that can be found with enough wires inside to wire up your trailer including brakes… and if limited to 4 wires per cable, maybe 2 parallel sections could be used… so wondering if that can run inside your tube and allow for the lid stretch and relax. I also have seen the strain relief cable connectors that use that wire mech cage for several inches to grip the cable and hold each end so you don’t allow the stress on connections. Kellums grips was one name I have seen and OZ Gedney or Appleton or T&B fittingly are all electrical brands that may have something. Maybe visit a local electric contractor supplier in your area if you want to investigate these ideas… you may already have something better figured out. When I bought my used boat to restore, the previous owner had obviously Jack-knifed the trailer and then cut off the tube steel to make the shortest tongue I have ever seen… if my boat was super narrow and pointy at the front, the normal boats would impact my vehicle when trying to back up and turn. I clear my lift hatch by maybe an inch. I figure if I keep throwing crazy or bad ideas out, that will just ensure you come up with much more well thought better ideas for all to learn lol.
    The following user(s) said Thank You: Larsspar

    Please Log in or Create an account to join the conversation.

    Dr.Go!

    1971 Glasspar Newport Cruiser - Rejuvenation 1 year 7 months ago #146900

    • Larsspar
    • Larsspar's Avatar Topic Author
    • Offline
    • Senior Boarder
    • Senior Boarder
    • Posts: 194
    • Karma: 3
    • Thank you received: 17
    Dr., thanks for all the additional good ideas. I'll be fitting a 7-way harness to the trailer which will support the brakes. I have my eye on a junction box from MICTUNING and was looking at 8-10 foot leads from companies like Curt. I'm concerned their offerings are not long enough though and I may have to buy bulk cable to make this work well. I likely need a 12-foot lead to the junction box. The 7-way harnesses carry wire of difference gauges, depending on the duty fulfilled. Perhaps the cable will be stiff enough to use as is, and no clever solutions will be required.......

    Turns out this trailer ball mount was torqued to the left also. Trying to see if I can straighten it back out.

    Busy day Sunday. I was able to disassemble and catalog the entire trailer.

    Here is the starting point:


    I started by focusing on the rollers. There is no better bench vise than the trailer itself.
    The rollers were attached 3 different ways.

    Rivet gun style


    Classic Cotter Pin


    Nut/bolt


    The nut/bolt combinations throughout the trailer use inference style nuts. Meaning, the nuts are slightly oval or sometimes peened, so they cut into the bolt when fastened.

    Attacked the riveted rollers first. 16 total and attached to the trailer bunks.
    Rather than cut them as others have recommended, I decided to use a die grinder and burr to grind away the peened over metal so I can re-use the roller pins. The burr I purchased was a cheapy and not very good. If you can find a diamond patterned carbide, you will be better served.


    Next, just had the two stern rollers which were bolted together. Came apart easily.


    5 keel rollers were cotter pinned, which were really easy.


    What's your favorite rubber rejuvenator?

    Continues in the next post.....

    Please Log in or Create an account to join the conversation.

    1971 Glasspar Newport Cruiser - Rejuvenation 1 year 7 months ago #146901

    • Larsspar
    • Larsspar's Avatar Topic Author
    • Offline
    • Senior Boarder
    • Senior Boarder
    • Posts: 194
    • Karma: 3
    • Thank you received: 17
    Continuing from the previous post.....

    The last roller is a small guy to support the keel by the bow. This one was attached with roll pins.


    I took a look online, and as many of you likely already know, it appears Rupco disappeared a long time ago.


    Next, pulled the basics tools together to unbolt the rest. I strongly recommend penetrating oil on each nut/bolt you separate. It keeps things cool and is easier on your tools. Additionally, before starting I took ~50 photos of the assembled product.


    Began by focusing on the tongue, winch stand and tongue beam. This is a Holsclaw with the tilt mechanism, so the tongue beam is attached to the rest of the trailer with a large bolt. Once complete I was left with this, which sat nicely on all four wheels.


    I took my time and focused on like components, carefully bagging and labeling as I disassembled. (example, I removed both bunks at the same time)

    I had few casualties. One disappointment was there are two adjustable feet under each bunk. The feet are attached to the adjustment bolt using a unique pin style nail or tack. I went two for four with this disassembly.


    The progression continued like this.


    Last couple thoughts in the next post.......

    Please Log in or Create an account to join the conversation.

    1971 Glasspar Newport Cruiser - Rejuvenation 1 year 7 months ago #146902

    • Larsspar
    • Larsspar's Avatar Topic Author
    • Offline
    • Senior Boarder
    • Senior Boarder
    • Posts: 194
    • Karma: 3
    • Thank you received: 17
    To wrap up, using a jack stand, I removed the tires from the hubs and then unbolted the hubs from the spindles one by one. This is a grimy job as you have to remove and discard all the grease packed into the bearing and hubs. These hubs were in okay shape. One bearing/race combination showed signs of some corrosion.

    I took the time to test fit the 7-inch Dexter electric brakes I purchased. The trailer did not come with the factory installed hydraulic surge brakes, but does have the mount points for them. (square bracket with four holes)


    I'll have some fabrication to do to make this work. The brake backing plates that bolt to the axle flange are offset ~1/3 inch too far to the inside of the axle.


    I'll have to create four spacer plates to move the brake backing plates flush with the edges of the drums. Additionally, I'll have to source brake backing plate studs that are 1/2 inch longer. Finally, I'll need to use the original sized Holsclaw wheel bearing and grease seals as the Dexter supplied parts are slightly too large for the axle spindles. Honestly, not that large an undertaking, so happy I can get this to work!!

    Here's a couple shots of the final inventories.


    3 parts need to be bent back into shape. One part needs some welding.
    All parts need to be washed to get grease and grime off prior to their trip to the Powder Coaters.

    Please Log in or Create an account to join the conversation.

    1971 Glasspar Newport Cruiser - Rejuvenation 1 year 7 months ago #146905

    • Larsspar
    • Larsspar's Avatar Topic Author
    • Offline
    • Senior Boarder
    • Senior Boarder
    • Posts: 194
    • Karma: 3
    • Thank you received: 17
    Dr., I was considering some of your ideas related to the telescopic tongue. Would you have the ' tight coil type cable jacketed multi- conductor cable' connected to a plug on the trailer end? Or were you thinking the cable would be long enough to extend fully when the tongue is removed?

    Please Log in or Create an account to join the conversation.

    1971 Glasspar Newport Cruiser - Rejuvenation 1 year 7 months ago #146909

    • Dr.Go!
    • Dr.Go!'s Avatar
    • Offline
    • Contributing Member
    • Contributing Member
    • Posts: 1719
    • Karma: 19
    • Thank you received: 125
    You have been very busy. Excellent work and great ideas. That looks like quite a robust trailer! Crazy how many different ways rollers were attached on our trailers. I wonder if an Armor All product or something similar the Car people use might bring back some luster to any reusable rollers. My black rollers were still in reasonably good shape, but they were leaving black rubber skid marks on my hull that I didn't like and then thought about the eventual next generation owner of my rig and wondered if the rollers would last...some in my case, I decided to spend a small fortune on new non-marring UV resistant rollers and then went overboard and purchased stainless steel pins instead of galvanized... hoping to avoid any future rust line drips once it got old... hopefully the next owner will be happy I did that when I am in my grave...certainly I didn't need to go that far to last for myself since I am older... but I just got carried away and did it. regarding the tongue wiring... I hadn't considered how you might use your trailer and possibly even remove he tongue extender completely for storage... maybe you could consider having 2 separate connector locations...1 normal at vehicle and the other at the point of the main trailer where the wiring exits the tongue tube. That way you could un-plug at this separation point and let the wiring section in the tongue tube stay with the tongue if removed. I could even make trailer wiring/light testing easier if you had a failure so you could isolate quicker. I do remember from my camper days that the multi conductor cable would have that larger gauge wire for the brake system. I wonder if places on-line like etrailer would have some bulk wire? It is also crazy how many individual pieces there are in an old trailer compared to a welded up newer trailer with bunks. I had 60 separate metal pieces to powder coat and just over 80 bolts (so with nuts, flat washers and lock washers, that was 320 pieces I salvaged because they were non rusted good bolts). It looks like you have way more pieces than I did. I know you will come up with a clever way to straighten that bent tongue, so waiting to eventually see that solution. It will be amazing when you finish it.

    Please Log in or Create an account to join the conversation.

    Dr.Go!

    1971 Glasspar Newport Cruiser - Rejuvenation 1 year 7 months ago #146917

    • Larsspar
    • Larsspar's Avatar Topic Author
    • Offline
    • Senior Boarder
    • Senior Boarder
    • Posts: 194
    • Karma: 3
    • Thank you received: 17
    Appreciate your thoughts Dr. Go. I have 93 parts for powder coating and 200 plus pieces of hardware to replate. I have a lot of busy work ahead of me.

    Carrying on with trailer work. As part of preparation for powder coating, the tires had to come off the wheels.
    I used this old shade tree mechanic trick to break the tire beads. (2 x 4 and a truck, both sides)


    Some soap/water and a couple tire irons and the tires came off the wheels pretty easily.


    The wheels are stamped with this General Tire insignia. If any of you have one or two that need a new home, please let me know, they're 4 1/2 x 12 (I'm looking for a spare)

    Attachments:

    Please Log in or Create an account to join the conversation.

    1971 Glasspar Newport Cruiser - Rejuvenation 1 year 7 months ago #146918

    • Larsspar
    • Larsspar's Avatar Topic Author
    • Offline
    • Senior Boarder
    • Senior Boarder
    • Posts: 194
    • Karma: 3
    • Thank you received: 17
    Next set my sights on the trailer tongue beam. It's 8 feet long and my 'big idea' is to modify it to have a 'slip tongue'.
    Correction from a previous post, the beam is 3 inches by 4 inches. (not 2 x 3)

    I started by putting an Evolution steel cutting blade in my old Black and Decker brick cutting saw.


    I drew a mark two feet from the tongue end of the beam and cut it into two pieces.


    The evolution blade cut through the metal with little effort. The finish is really clean. I was surprised to see Holsclaw painted the inside of the tubing.


    I took the short end down to the shop. As you can see, trailer was backed into a tight spot a couple times.


    Using a series of different length bolts, nuts, and bushings, I was able to press the metal back to near original shape.


    Once complete, I dropped both pieces off at a local metal fabrication place with this rough pencil drawing of the 'big idea'. I decided to do this after some online shopping led me to determine there wasn't anything off the shelf to complete the job.


    I'll know early next week if the shop can fabricate a beam that will slide nicely inside the existing parts.

    Please Log in or Create an account to join the conversation.

    1971 Glasspar Newport Cruiser - Rejuvenation 1 year 7 months ago #146921

    Man, I'm beginning to wonder if you have a job you get so much done to your boat! Amazing progress, as usual.
    Not to get off on a tangent here, but is there a benefit to rollers versus bunks or bunks versus rollers? My trailer of as yet unknown make originally had rollers...still has a couple, actually. But at some point an owner modified the trailer adding carpeted bunks to it. It seems to me the bunks do a nice job of cradling the hull without rollers which can act like pressure points on a hull, but what do i know. I'm just trying to decide which way to go when restoration time comes.
    Thanks!
    Eric
    The following user(s) said Thank You: Larsspar

    Please Log in or Create an account to join the conversation.

    1971 Glasspar Newport Cruiser - Rejuvenation 1 year 7 months ago #146924

    • Larsspar
    • Larsspar's Avatar Topic Author
    • Offline
    • Senior Boarder
    • Senior Boarder
    • Posts: 194
    • Karma: 3
    • Thank you received: 17
    Hi Eric,

    yes, I do have a job. Have to keep going for several more years.........I also have a supportive wife/family.

    I try to do 90 minutes boat time after work/dinner each night and some on the weekends. Easier during the summer when the kids don't have homework and as many activities. (although there's yard work and home maintenance) I also don't sleep as much as I'd like.

    This whole project is a bit fickle. I'm making a push now as I have ~8 weeks left before cool weather becomes prevalent, eliminating painting/finish opportunities for large items. Work in a couple family trips and the timelines tighten. I do wear down and then have to recharge.

    Related to bunks, it definately seems the carpeted planks are what most boat owners prefer these days. I believe it is also cheaper to make and easier to maintain. I spoke with the fiberglass guy I worked with and he viewed the carpeted bunks as preferred for the complete support they provide. He did like the roller bunks on my Holsclaw trailer because there are 8 per side and they are closely spaced together.

    I'm committed to keep this trailer and boat together. It's also going to cost me a fair bit to do so. (I'm sure some believe I should be committed)

    Please Log in or Create an account to join the conversation.

    1971 Glasspar Newport Cruiser - Rejuvenation 1 year 7 months ago #146927

    My thoughts on trailers:

    Old boats were typically narrower and frequently didn't have an 8' beam until greater than 20'. Then in 85 or so, max trailering width was raised to 8.5' so boats & trailers got wider again.

    Bottom line is for older boats less than 20' a new trailer will be way wider than the boat. I put a late model EZ Loader (bunk style) under my 17' SeaRay & it sticks out about 1' on each side. Tows great but requires more storage room. A new trailer under your Glaspar would probably be 8.5' & I assume your boat is 8' so not a huge issue.

    Not all boats are constructed equally, so in my opinion a heavily built boat on a properly adjusted all roller trailer is OK. But a frequent issue was boat dealers putting a underrated trailer under a boat to make a sale. Lots of roller trailers had multiple options for the quantity of rollers. The more the better.

    Carpet bunks are good BUT, wood is flexible and so typically the weight is concentrated under the bunk brackets & not equally the entire length.

    Your roller bunks are in a metal channel & I'd guess the weight is close to equally distributed throughout. I have the same style roller bunks on the Spartan under my Shell Lake.
    Attachments:

    Please Log in or Create an account to join the conversation.

    1971 Glasspar Newport Cruiser - Rejuvenation 1 year 7 months ago #146928


    While trying to upright my picture & attach the 2nd, I inadvertently double posted & can't delete the above post. I should just throw my phone away, it's junk!

    My thoughts on trailers:

    Old boats were typically narrower and frequently didn't have an 8' beam until greater than 20'. Then in 85 or so, max trailering width was raised to 8.5' so boats & trailers got wider again.

    Bottom line is for older boats less than 20' a new trailer will be way wider than the boat. I put a late model EZ Loader (bunk style) under my 17' SeaRay & it sticks out about 1' on each side. Tows great but requires more storage room. A new trailer under your Glaspar would probably be 8.5' & I assume your boat is 8' so not a huge issue.

    Not all boats are constructed equally, so in my opinion a heavily built boat on a properly adjusted all roller trailer is OK. But a frequent issue was boat dealers putting a underrated trailer under a boat to make a sale. Lots of roller trailers had multiple options for the quantity of rollers. The more the better.

    Carpet bunks are good BUT, wood is flexible and so typically the weight is concentrated under the bunk brackets & not equally the entire length.

    Your roller bunks are in a metal channel & I'd guess the weight is close to equally distributed throughout. I have the same style roller bunks on the Spartan under my Shell Lake.
    Attachments:
    The following user(s) said Thank You: Larsspar

    Please Log in or Create an account to join the conversation.

    1971 Glasspar Newport Cruiser - Rejuvenation 1 year 7 months ago #146931

    • Larsspar
    • Larsspar's Avatar Topic Author
    • Offline
    • Senior Boarder
    • Senior Boarder
    • Posts: 194
    • Karma: 3
    • Thank you received: 17
    Jimandros, thanks for the trailer information. I wasn't aware of the 1980's regulation changes, but it makes perfect sense. Many boat's beam increased during that period of time.

    The beam on my boat is 88" at it's widest point, so 8 inches short of 8 feet.

    Your boats in the pictures are truly clean......beautiful. What are the power plants in each one? It appears you have an OMC in one and a Mercruiser in the other. Are the trim plate original to your Shell Lake? How are they adjusted?

    Please Log in or Create an account to join the conversation.

    1971 Glasspar Newport Cruiser - Rejuvenation 1 year 7 months ago #146932

    Shell Lake has original OMC 155HP V6
    SeaRay has 165HP MerCruiser I6. Original was 140 4cyl but the 6 cyl was a factory option so I found a donor Larson back in 2004. Needed a new motor box, so I did the entire interior.
    Attachments:
    The following user(s) said Thank You: Larsspar

    Please Log in or Create an account to join the conversation.

    1971 Glasspar Newport Cruiser - Rejuvenation 1 year 7 months ago #146997

    • Larsspar
    • Larsspar's Avatar Topic Author
    • Offline
    • Senior Boarder
    • Senior Boarder
    • Posts: 194
    • Karma: 3
    • Thank you received: 17
    Jim, my dream is to have an engine and bilge as clean and tidy as your boats have.

    That is exceptional work?

    Do your boats have marine carpeting or perhaps a vinyl flooring of some sort?

    Did you do all the work yourself?

    Please Log in or Create an account to join the conversation.

    1971 Glasspar Newport Cruiser - Rejuvenation 1 year 7 months ago #147000

    Dish soap, hot water & a long handle scrub brush to keep the bilge clean. And put a pig mat under the engine to catch any oil drips.

    They aren't perfect but I do get lots of attention. You will too when you are finished. I thought you would see the water this season but I guess not. Hopefully next year.

    Both Shell Lakes have vinyl, both could use replacing but the turquoise is not on every street corner. SeaRay has forest green carpet, Evinrude has gray.

    I do all the work. The Evinrude was the biggest project, stripped down to a bare hull with new stringers, floor & foam.

    Please Log in or Create an account to join the conversation.

    1971 Glasspar Newport Cruiser - Rejuvenation 1 year 7 months ago #147004

    • Larsspar
    • Larsspar's Avatar Topic Author
    • Offline
    • Senior Boarder
    • Senior Boarder
    • Posts: 194
    • Karma: 3
    • Thank you received: 17
    Is the engine belt cover on your Shell Lake original, or is that your handy work?

    Please Log in or Create an account to join the conversation.

    1971 Glasspar Newport Cruiser - Rejuvenation 1 year 7 months ago #147005

    Original OMC part. here is a picture of the 120HP OMC with similar part.
    Attachments:
    The following user(s) said Thank You: Larsspar

    Please Log in or Create an account to join the conversation.

    1971 Glasspar Newport Cruiser - Rejuvenation 1 year 7 months ago #147034

    • Larsspar
    • Larsspar's Avatar Topic Author
    • Offline
    • Senior Boarder
    • Senior Boarder
    • Posts: 194
    • Karma: 3
    • Thank you received: 17
    Continuing work on the trailer

    Progress has been a bit slow recently, had a small supply chain issue

    Was able to procure a 3/8" x 3 3/4" x 24" steel bar from my local Speedy Metals. (a bit spendy to be sure)

    Using the chop saw with the evolution blade, cut 3 3/4" square pieces which will be the brake backing plate spacer plates.


    Using a scribe and square, found the center point of each piece and center punched them.


    Then I waited. I needed a 1 1/2" carbide hole saw and could not find one locally. Had to order through a local big box store and wait 5 days. Once received, proceed drill a center hole in each plate.


    Using one of the trailer axles as a template, drilled four bolt holes and four placement holes in each plate


    Stripped the brake backing plates and drums so they can be powder coated


    Scrubbed all the trailer parts with Simple Green


    Packaged up and ready to go to the powder coating shop

    Please Log in or Create an account to join the conversation.

    1971 Glasspar Newport Cruiser - Rejuvenation 1 year 6 months ago #147038

    • Dr.Go!
    • Dr.Go!'s Avatar
    • Offline
    • Contributing Member
    • Contributing Member
    • Posts: 1719
    • Karma: 19
    • Thank you received: 125
    Excellent. Busy progress… it will be like Christmas when you get your parts back from the Powdercoat facility… gives you renewed energy when you do assembly, because you know each step will get you closer to having a brand new fresh trailer! Mine is by no means perfect, nor is it restored for museum display, but it sure meant a lot when I saw a guy do a complete walk around and looking very closely and then said to me “I have done car restoration for the past 28 years and I just wanted to let you know that I noticed you didn’t cut corners on anything and he was showing his teenage son all of the details… and to think I originally didn’t think I would bother doing this except a paint brush, new bearings and tires just for function. I just decided that at my old age, I am really not the owner of the boat, but rather the care taker until I am gone and someday another family member or other person will own it and I didn’t want it sent to the junk yard because of my neglect. Thanks for keeping the pictures coming… I have a small fishing boat trailer that still needs restoration, so I can still get ideas from you.
    The following user(s) said Thank You: Larsspar

    Please Log in or Create an account to join the conversation.

    Dr.Go!
    Time to create page: 0.552 seconds

    Donate

    Please consider supporting our efforts.

    FG Login

    Glassified Ads

    Homelie/Bearcat
    ( / Engines)

    noimage
    03-17-2024

    Thunderbird Apache 1956 hardtop
    ( / Boats)

    noimage
    03-10-2024

    1968 Glastron GT160
    ( / Boats)

    1968 Glastron GT160
    03-07-2024

    FiberGoogle

    Who's Online

    We have 6036 guests and one member online