Welcome, Guest
Username: Password: Remember me
  • Page:
  • 1
  • 2

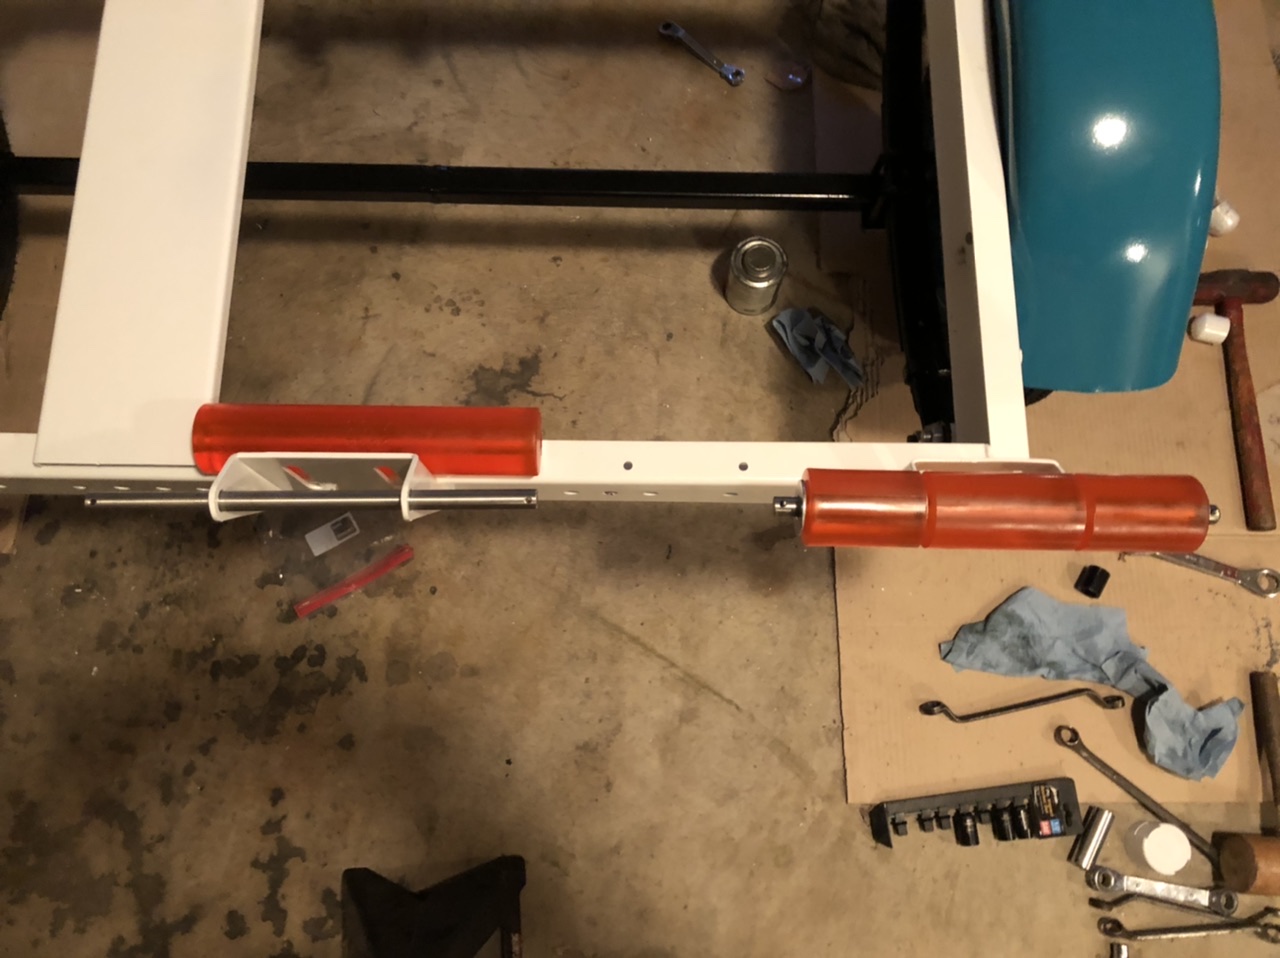
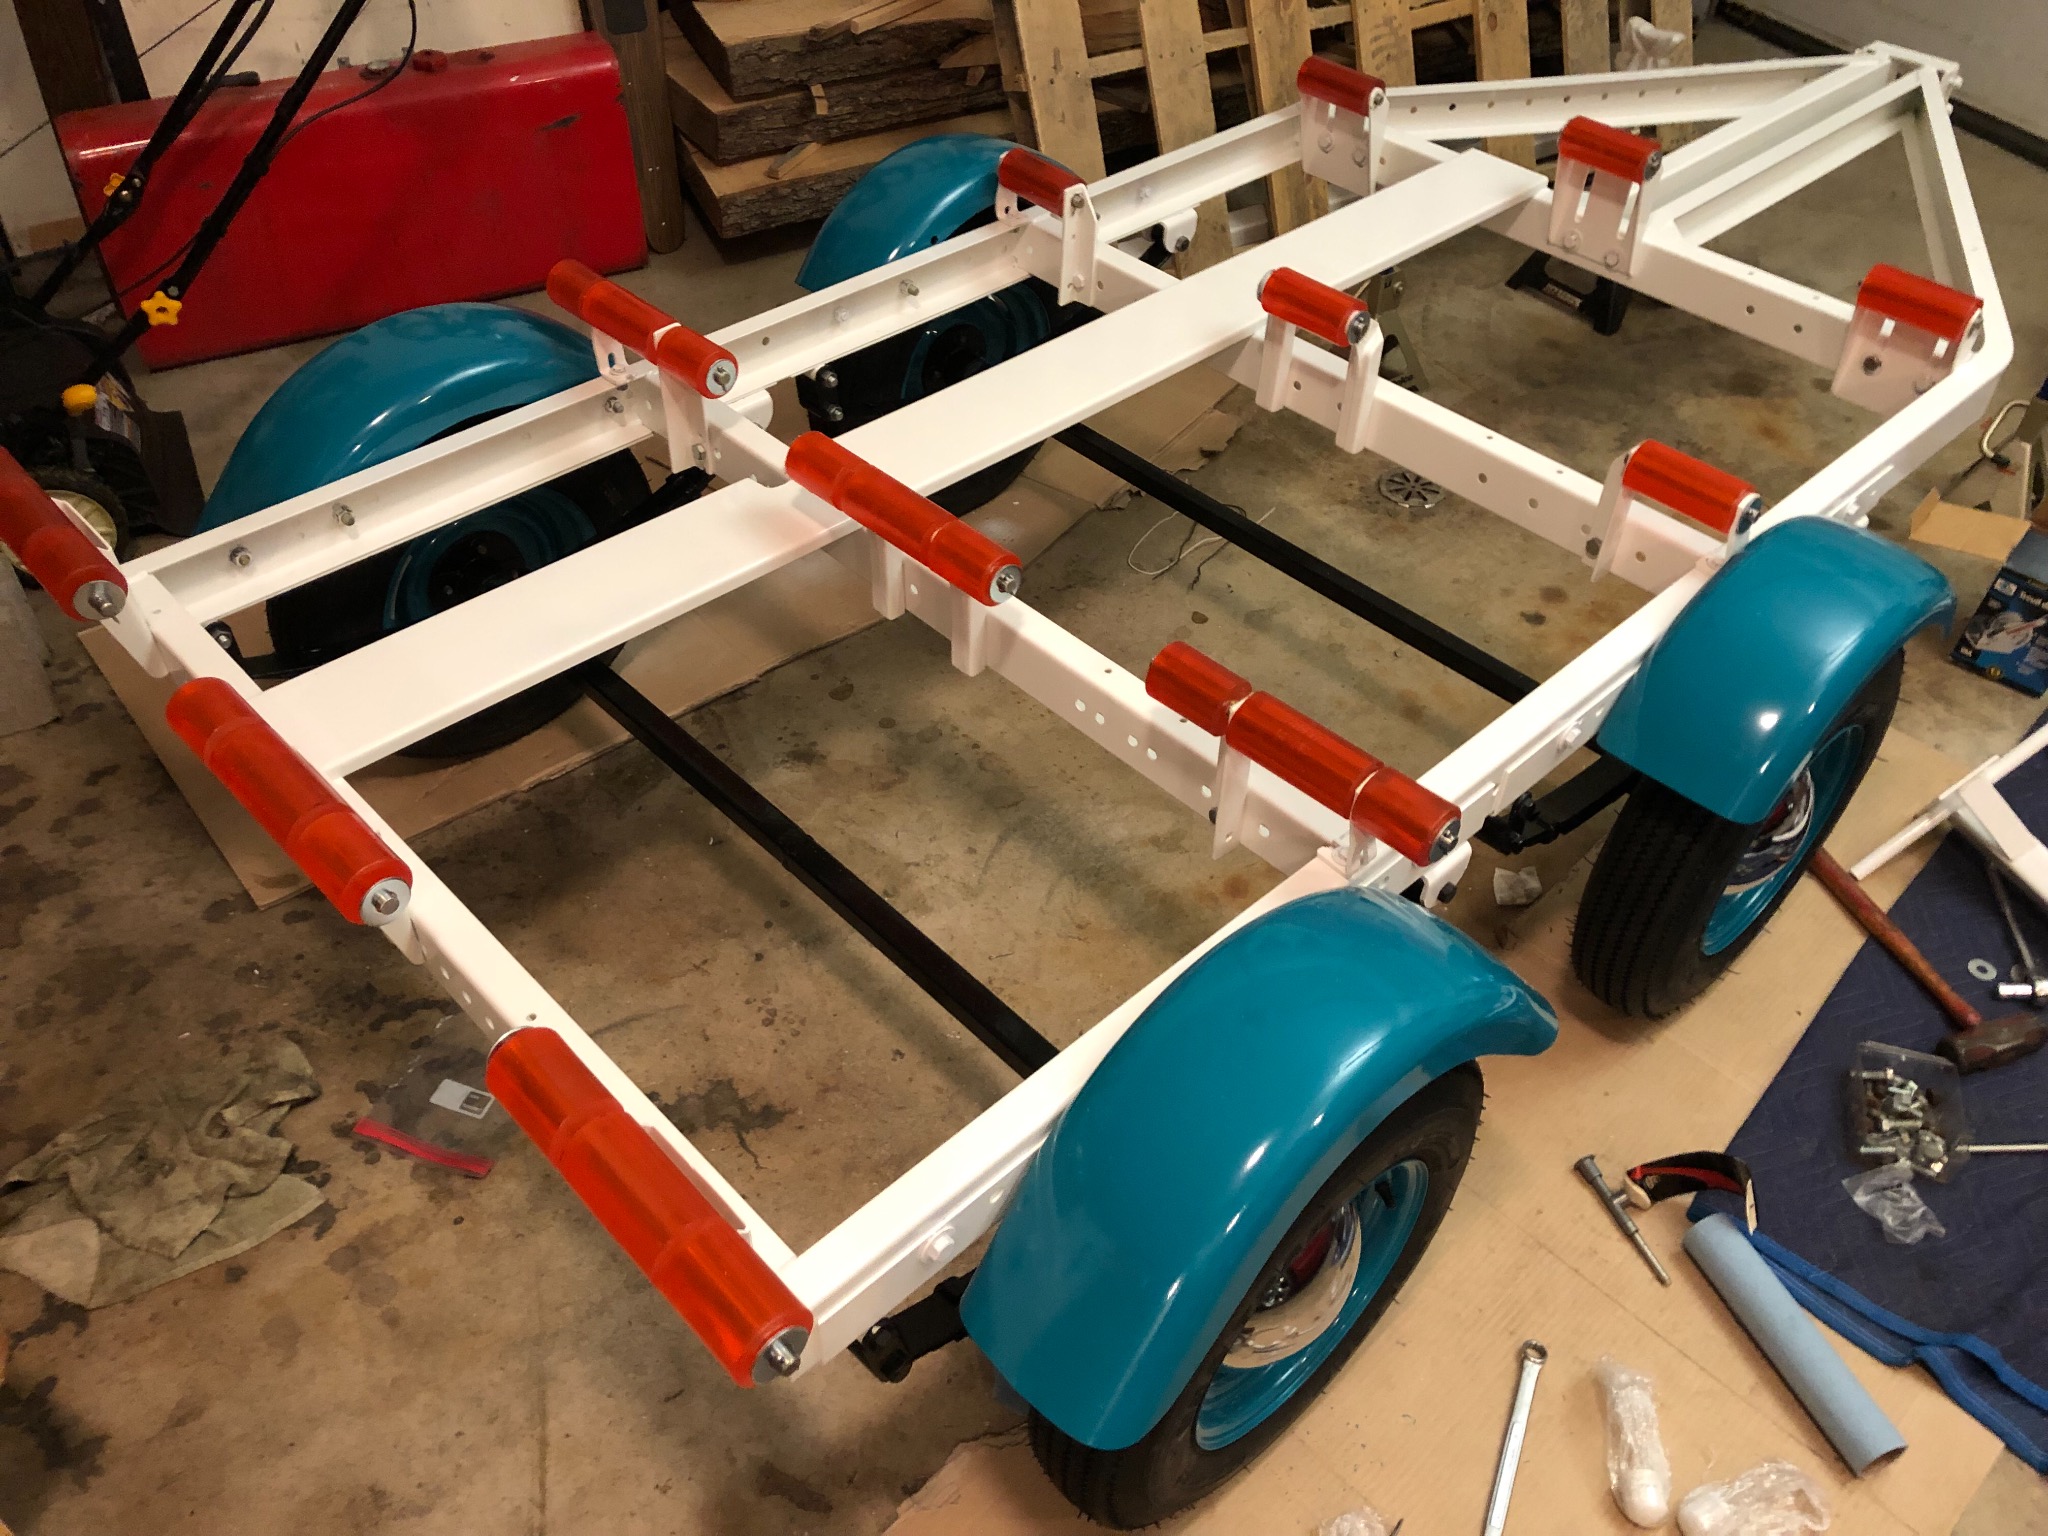
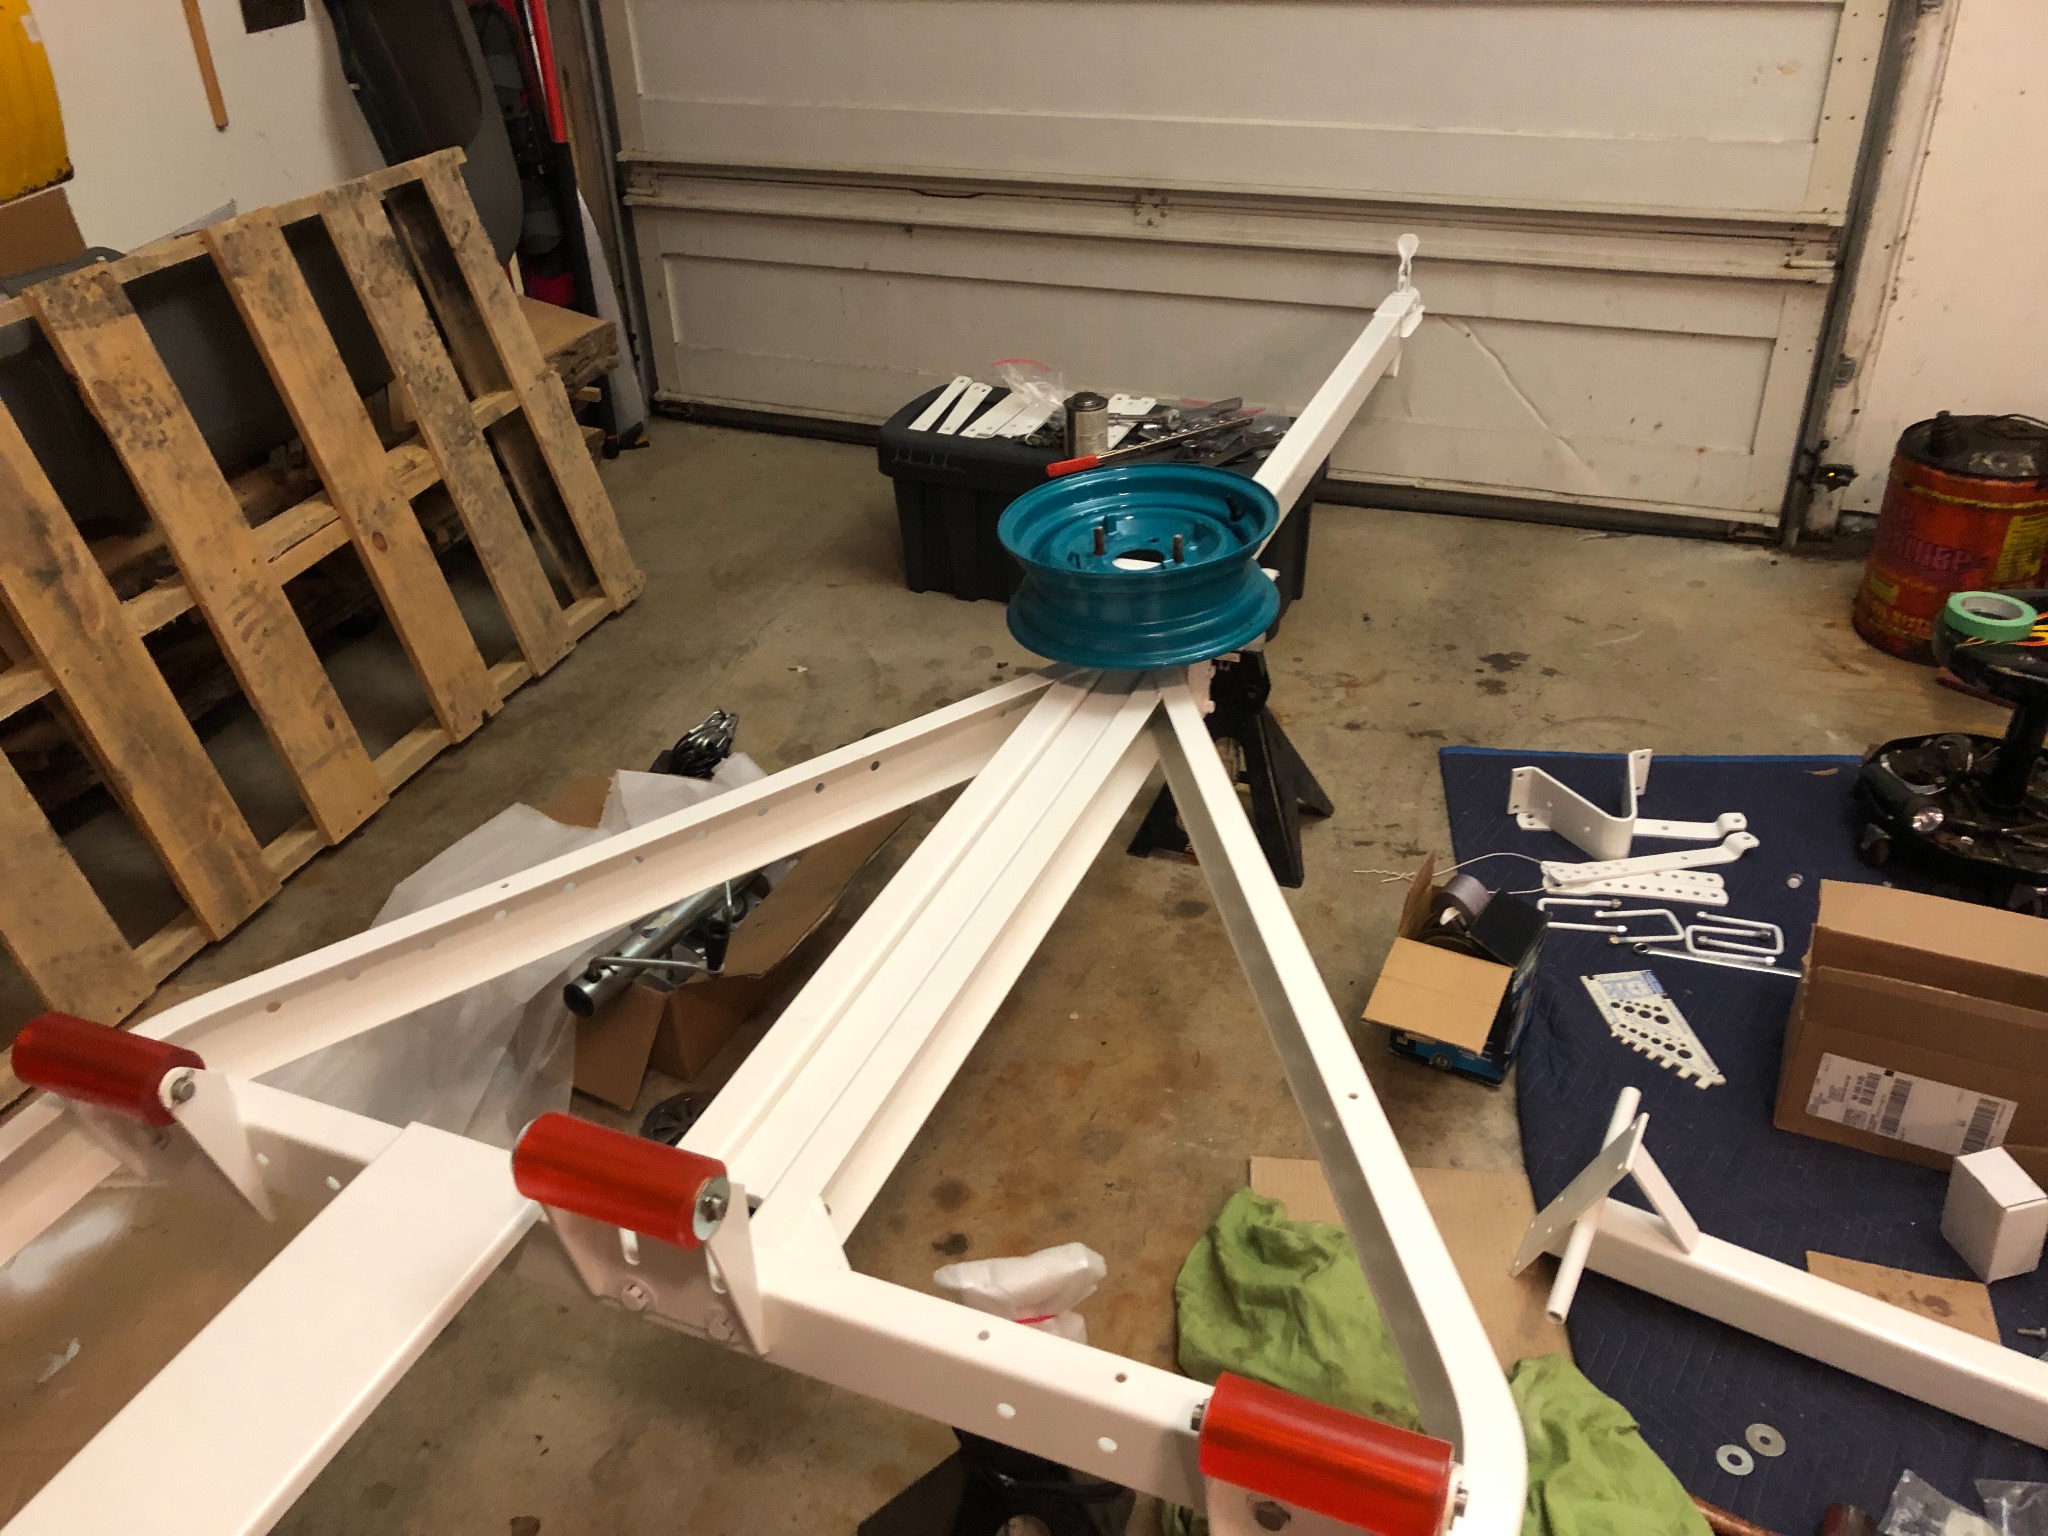
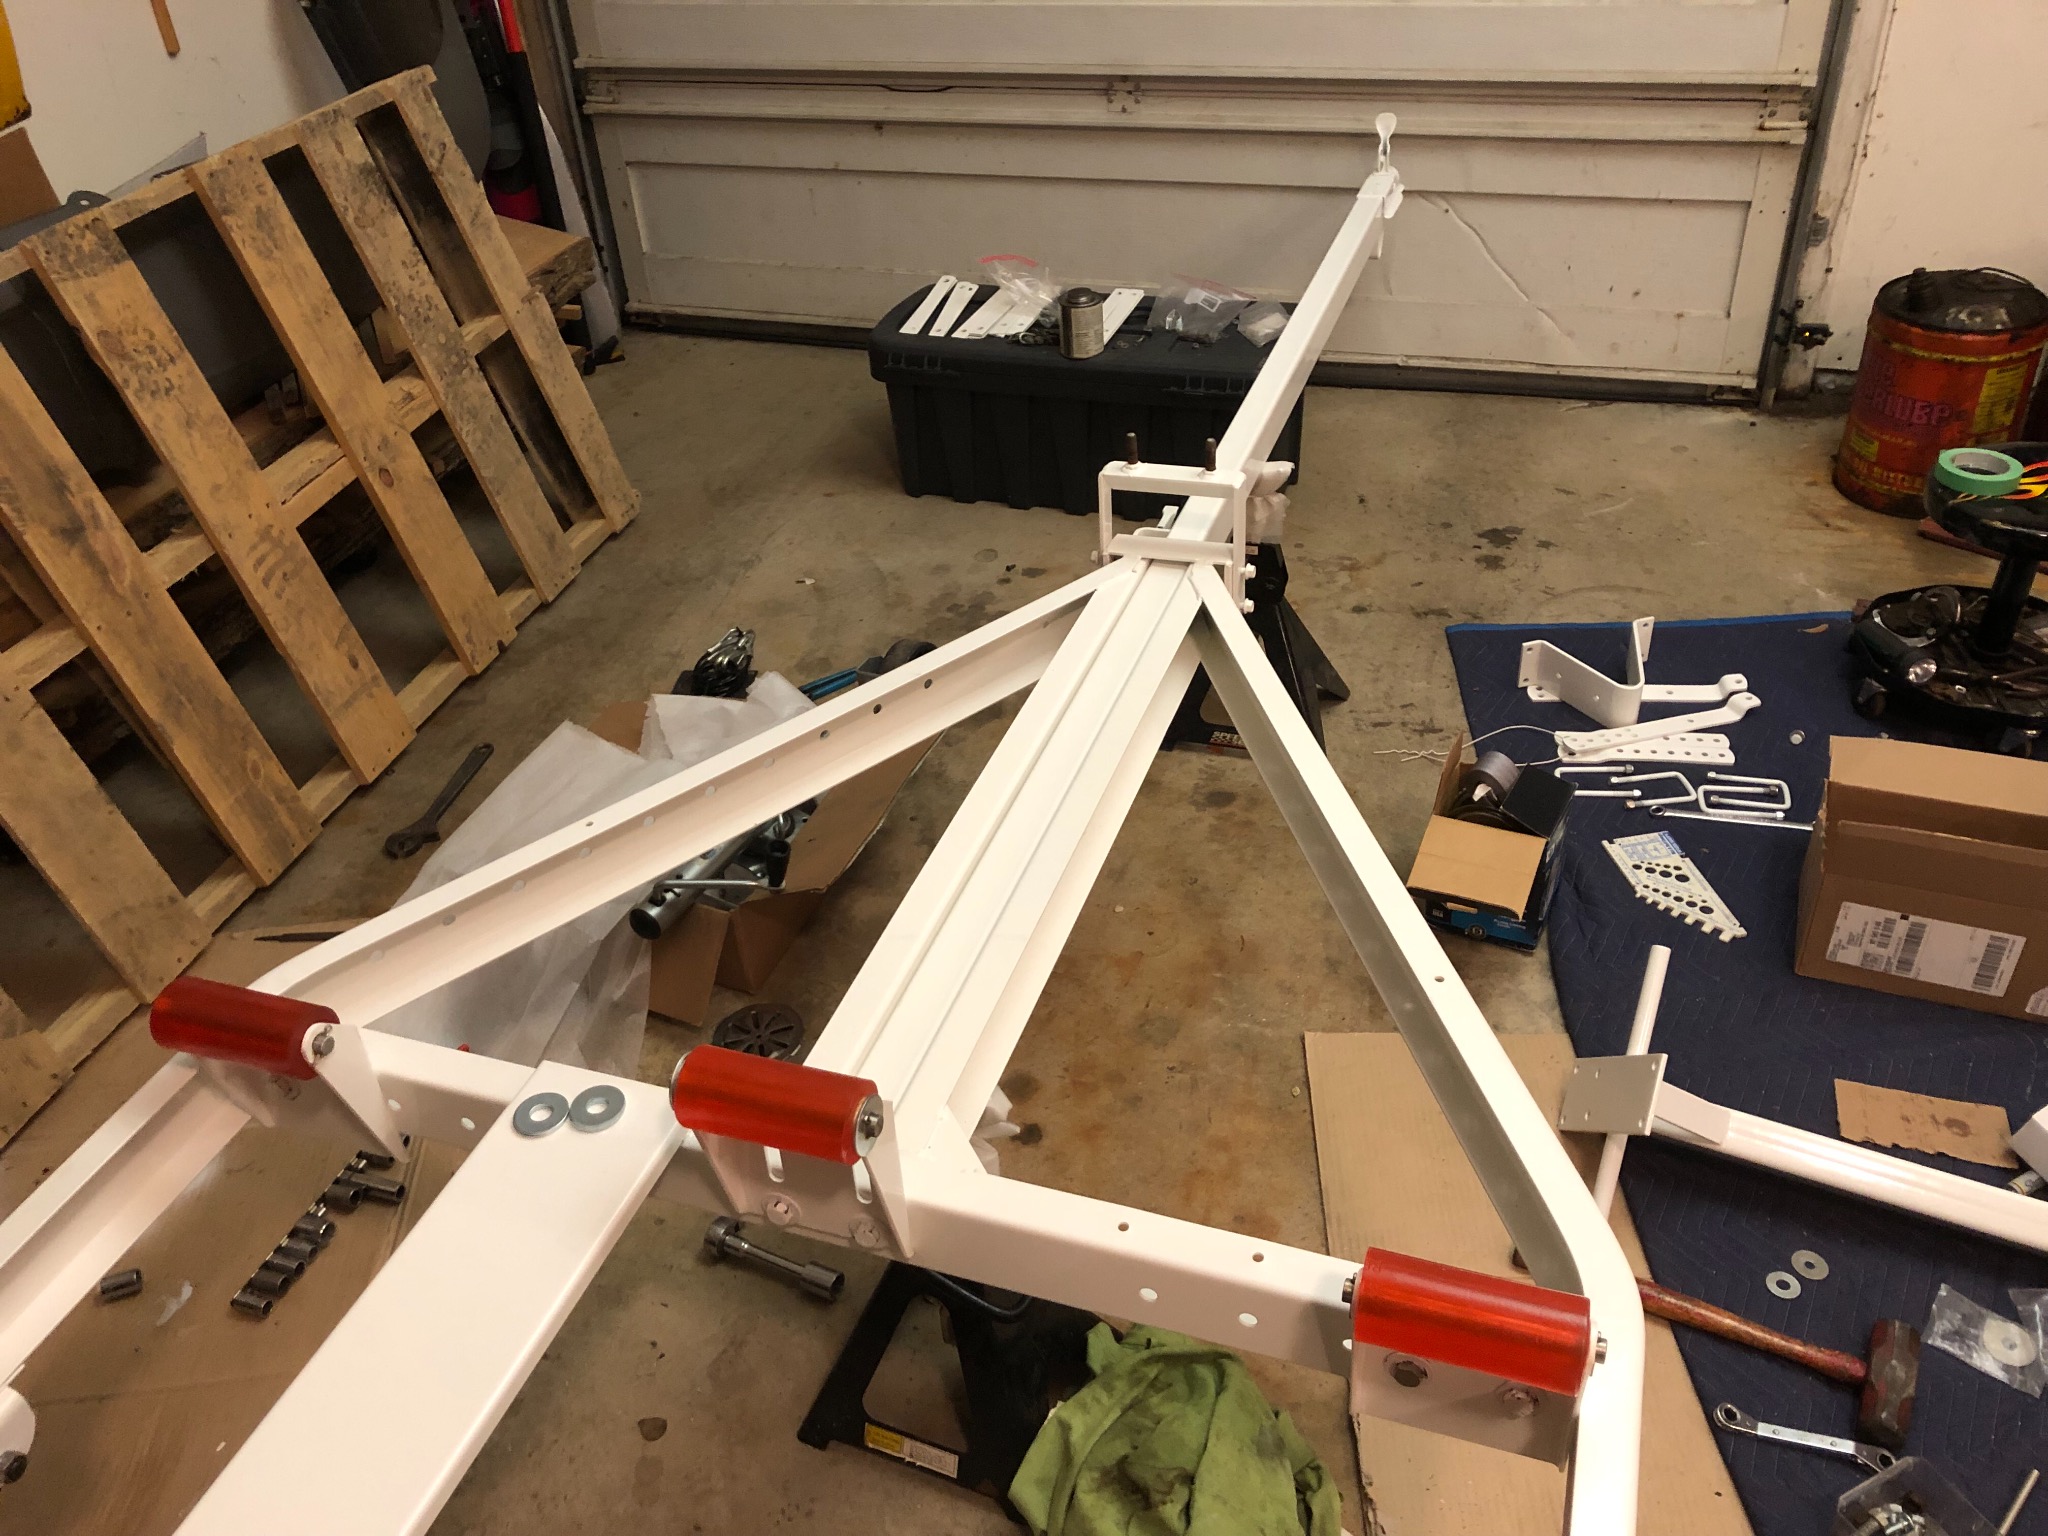
TOPIC: '65 TrailCar trailer repaint questions
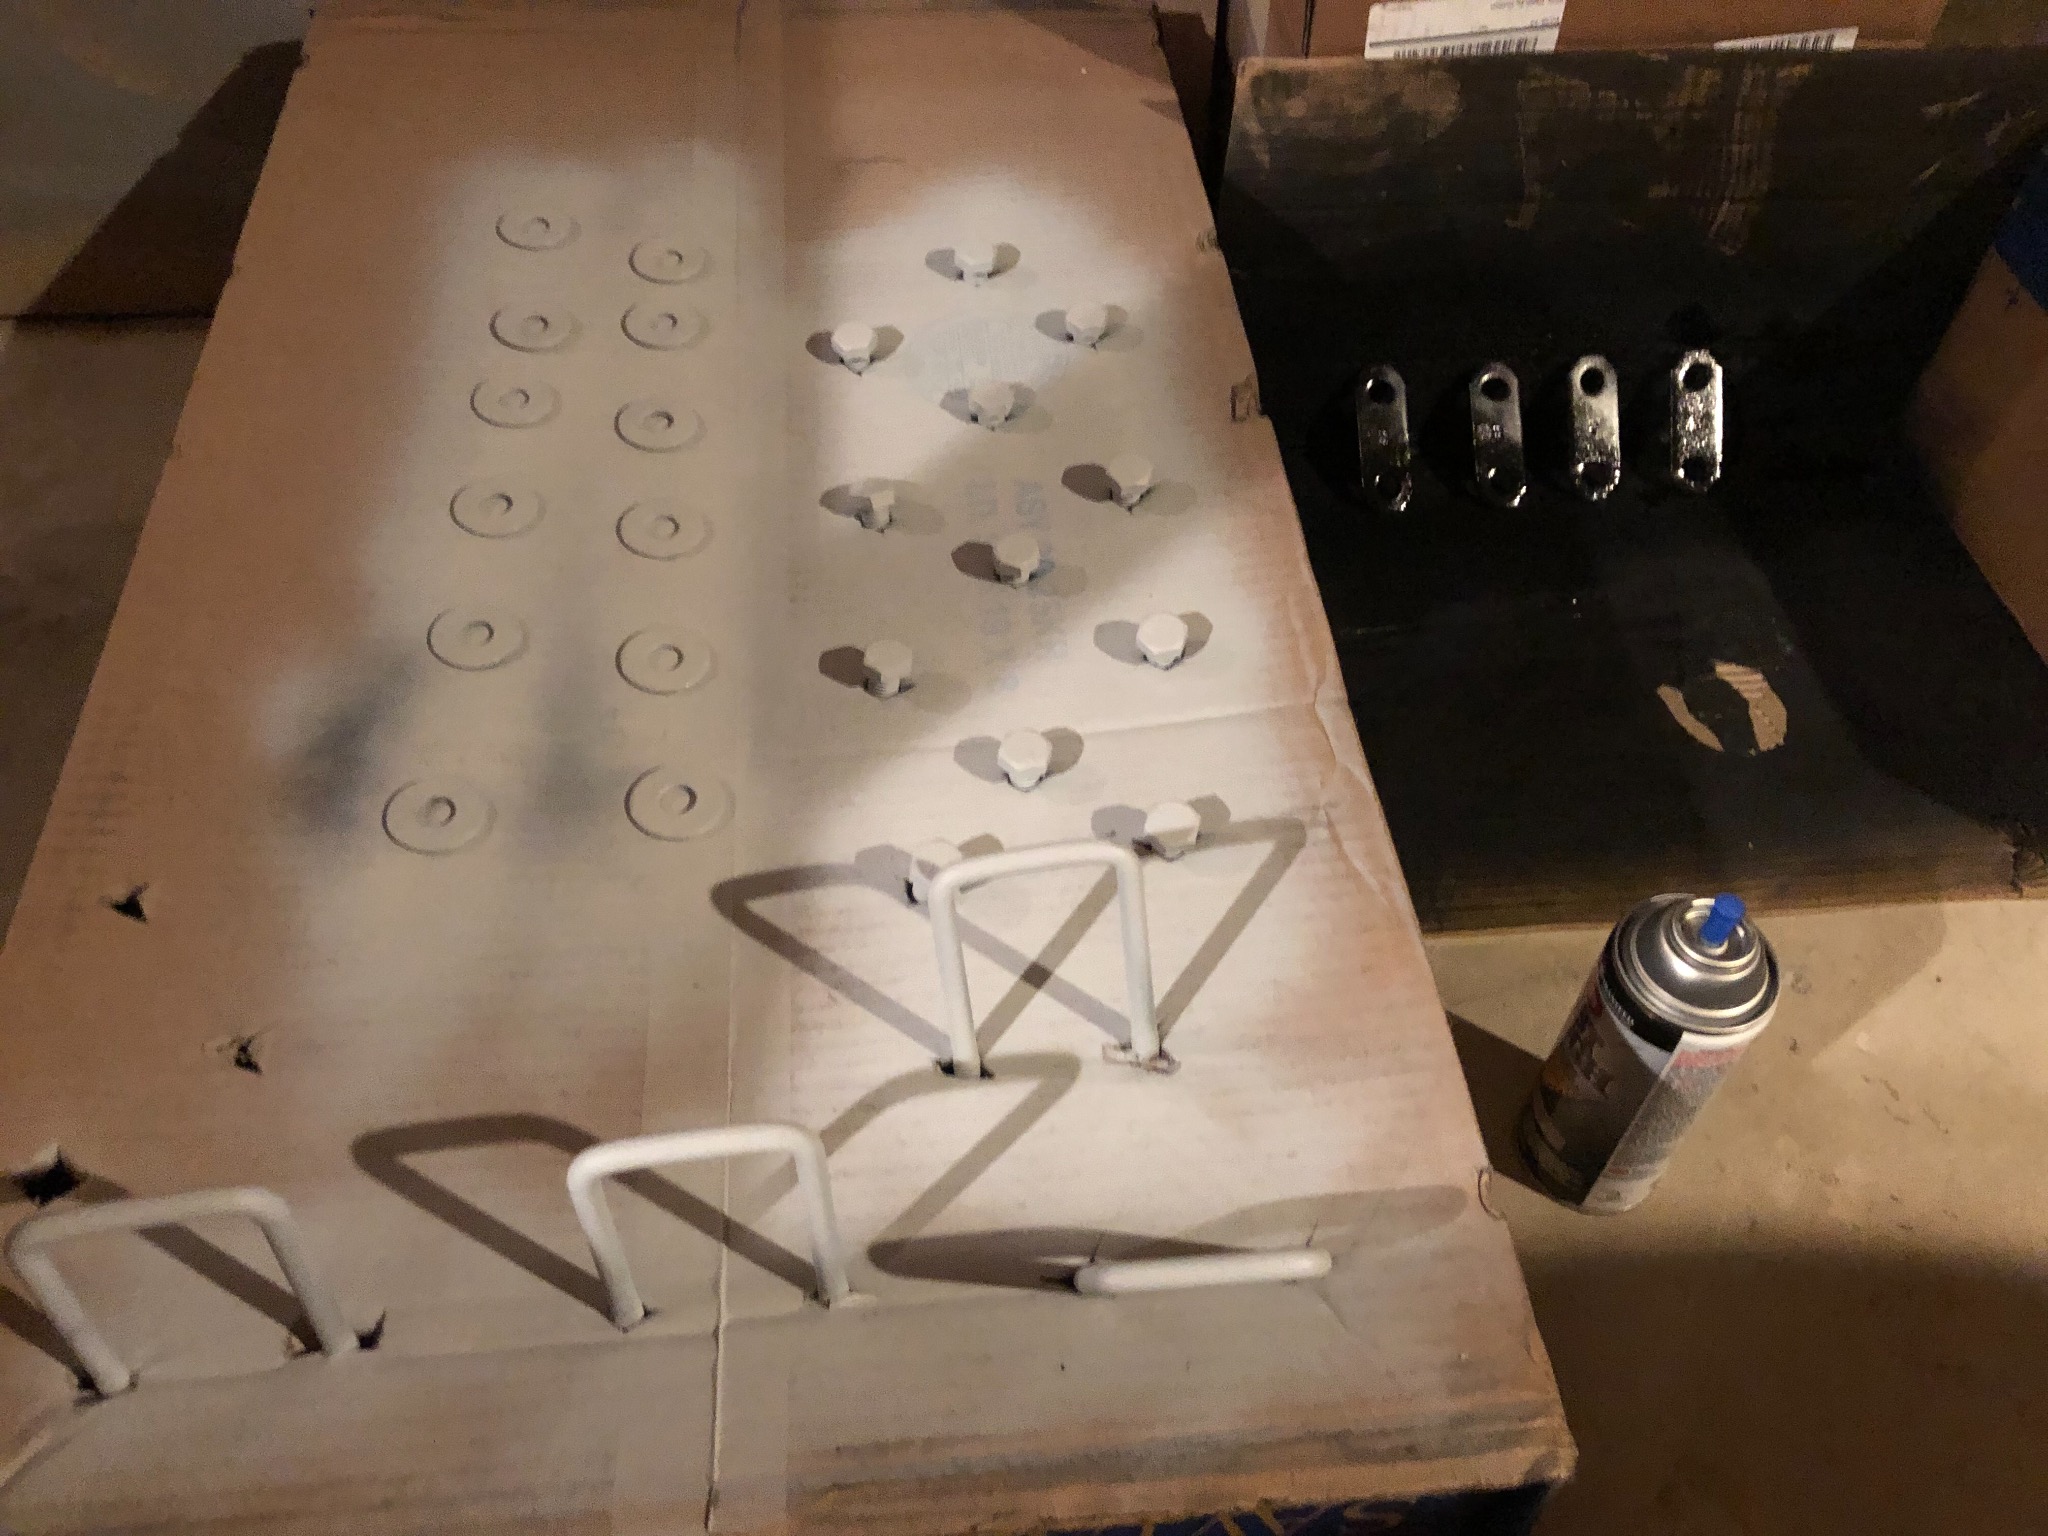
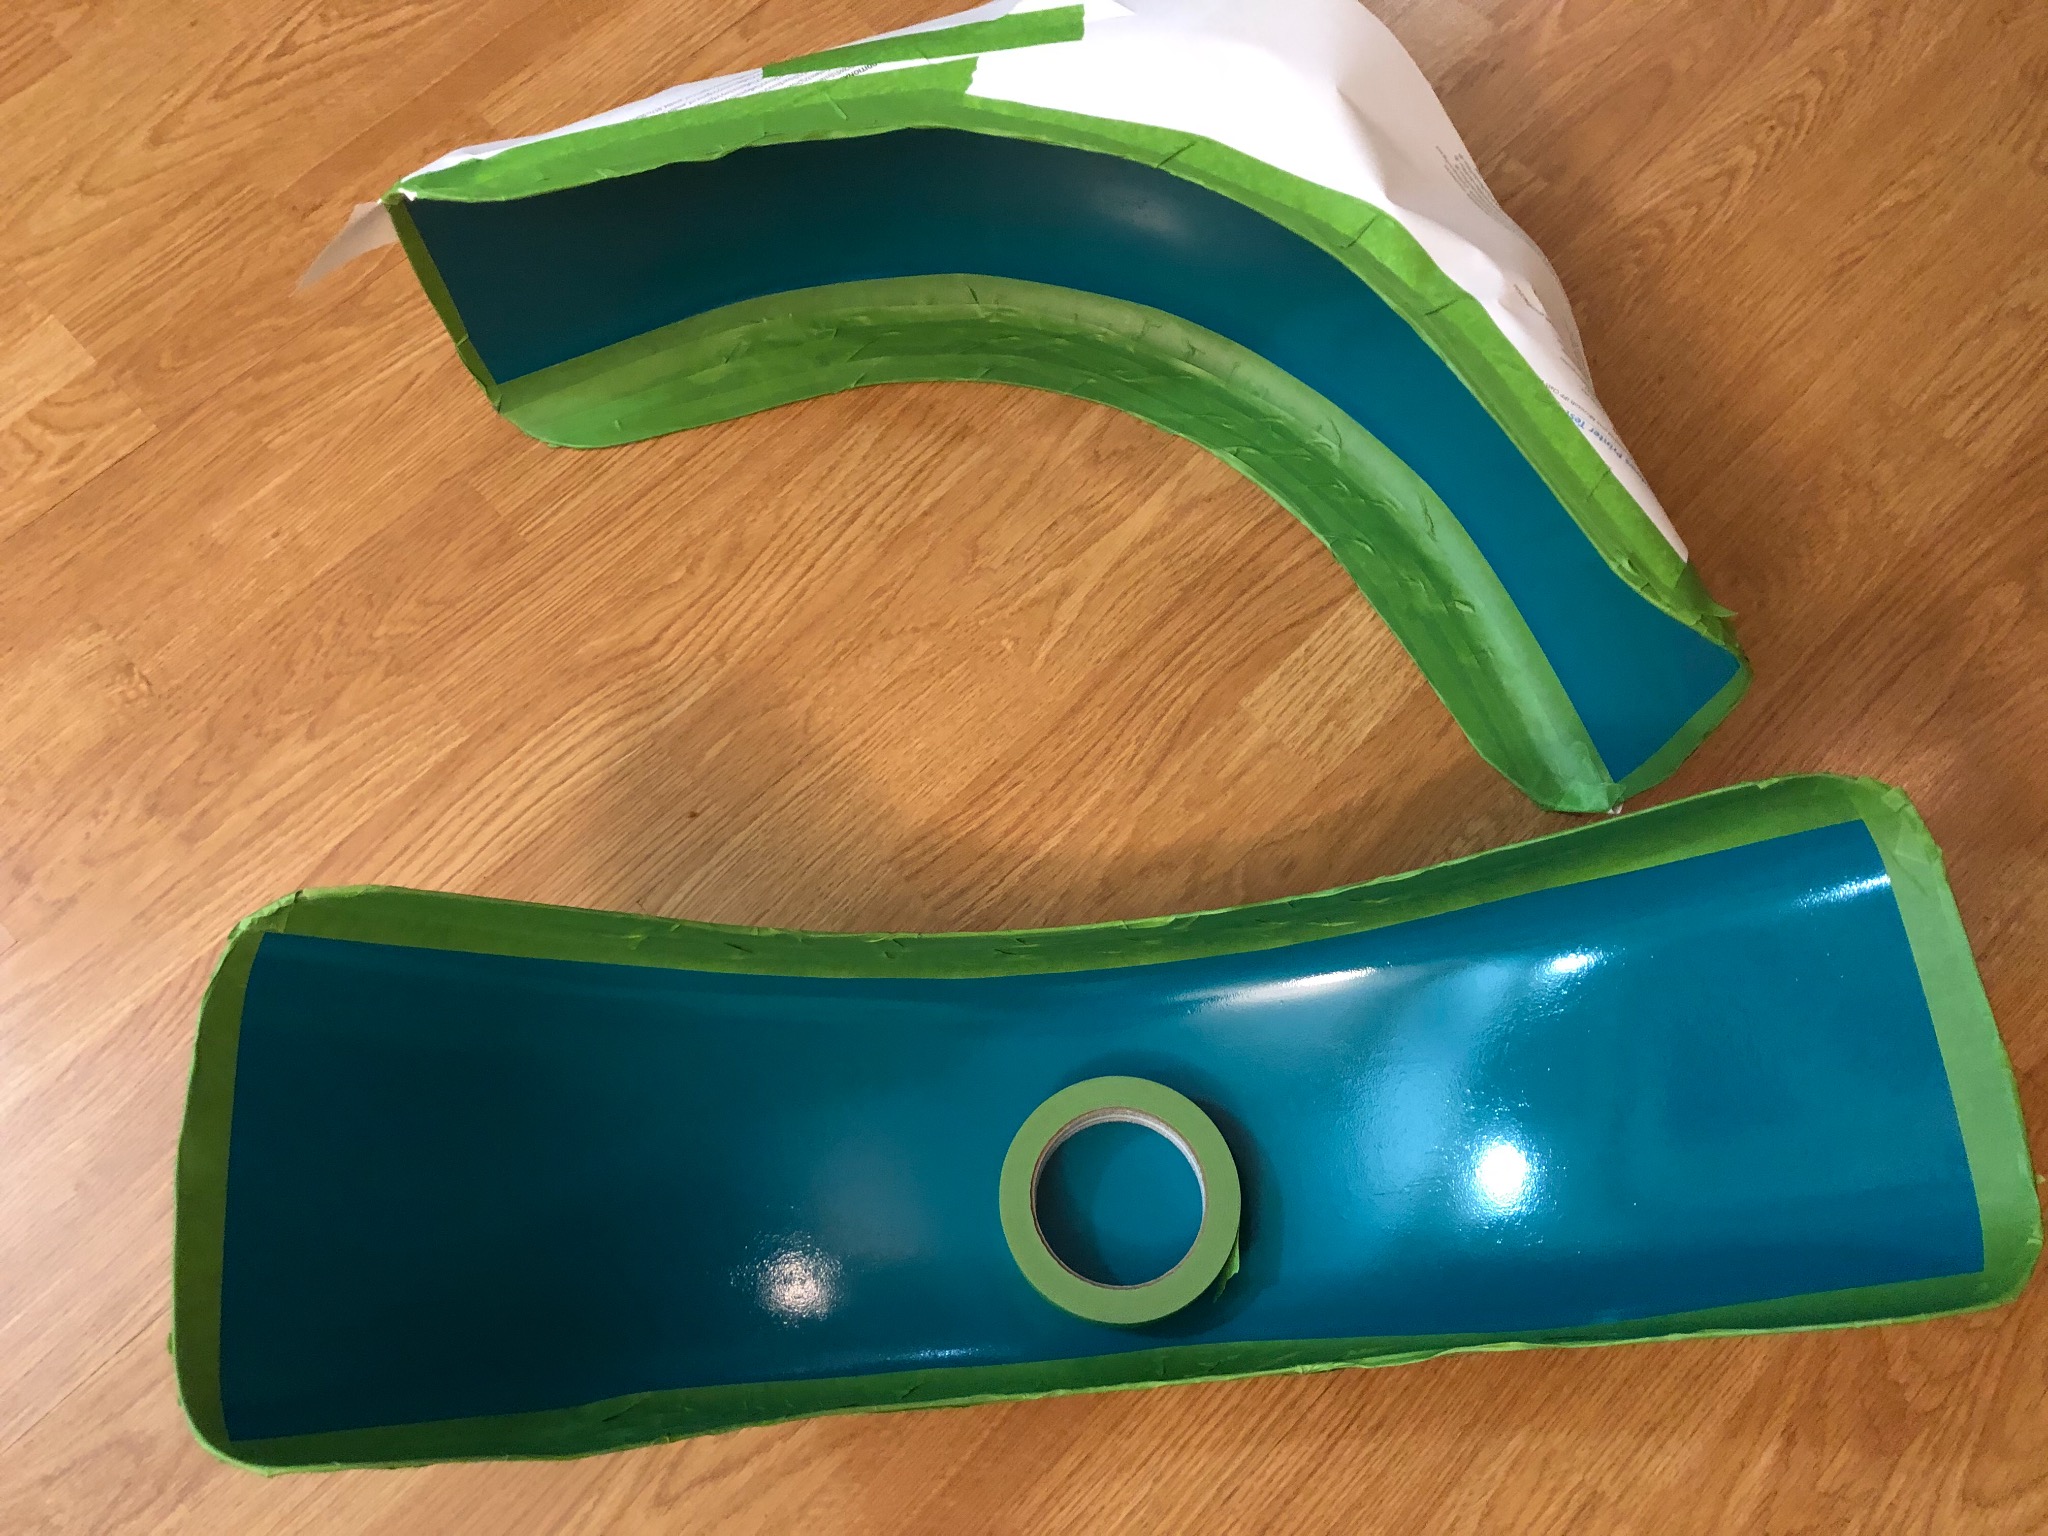
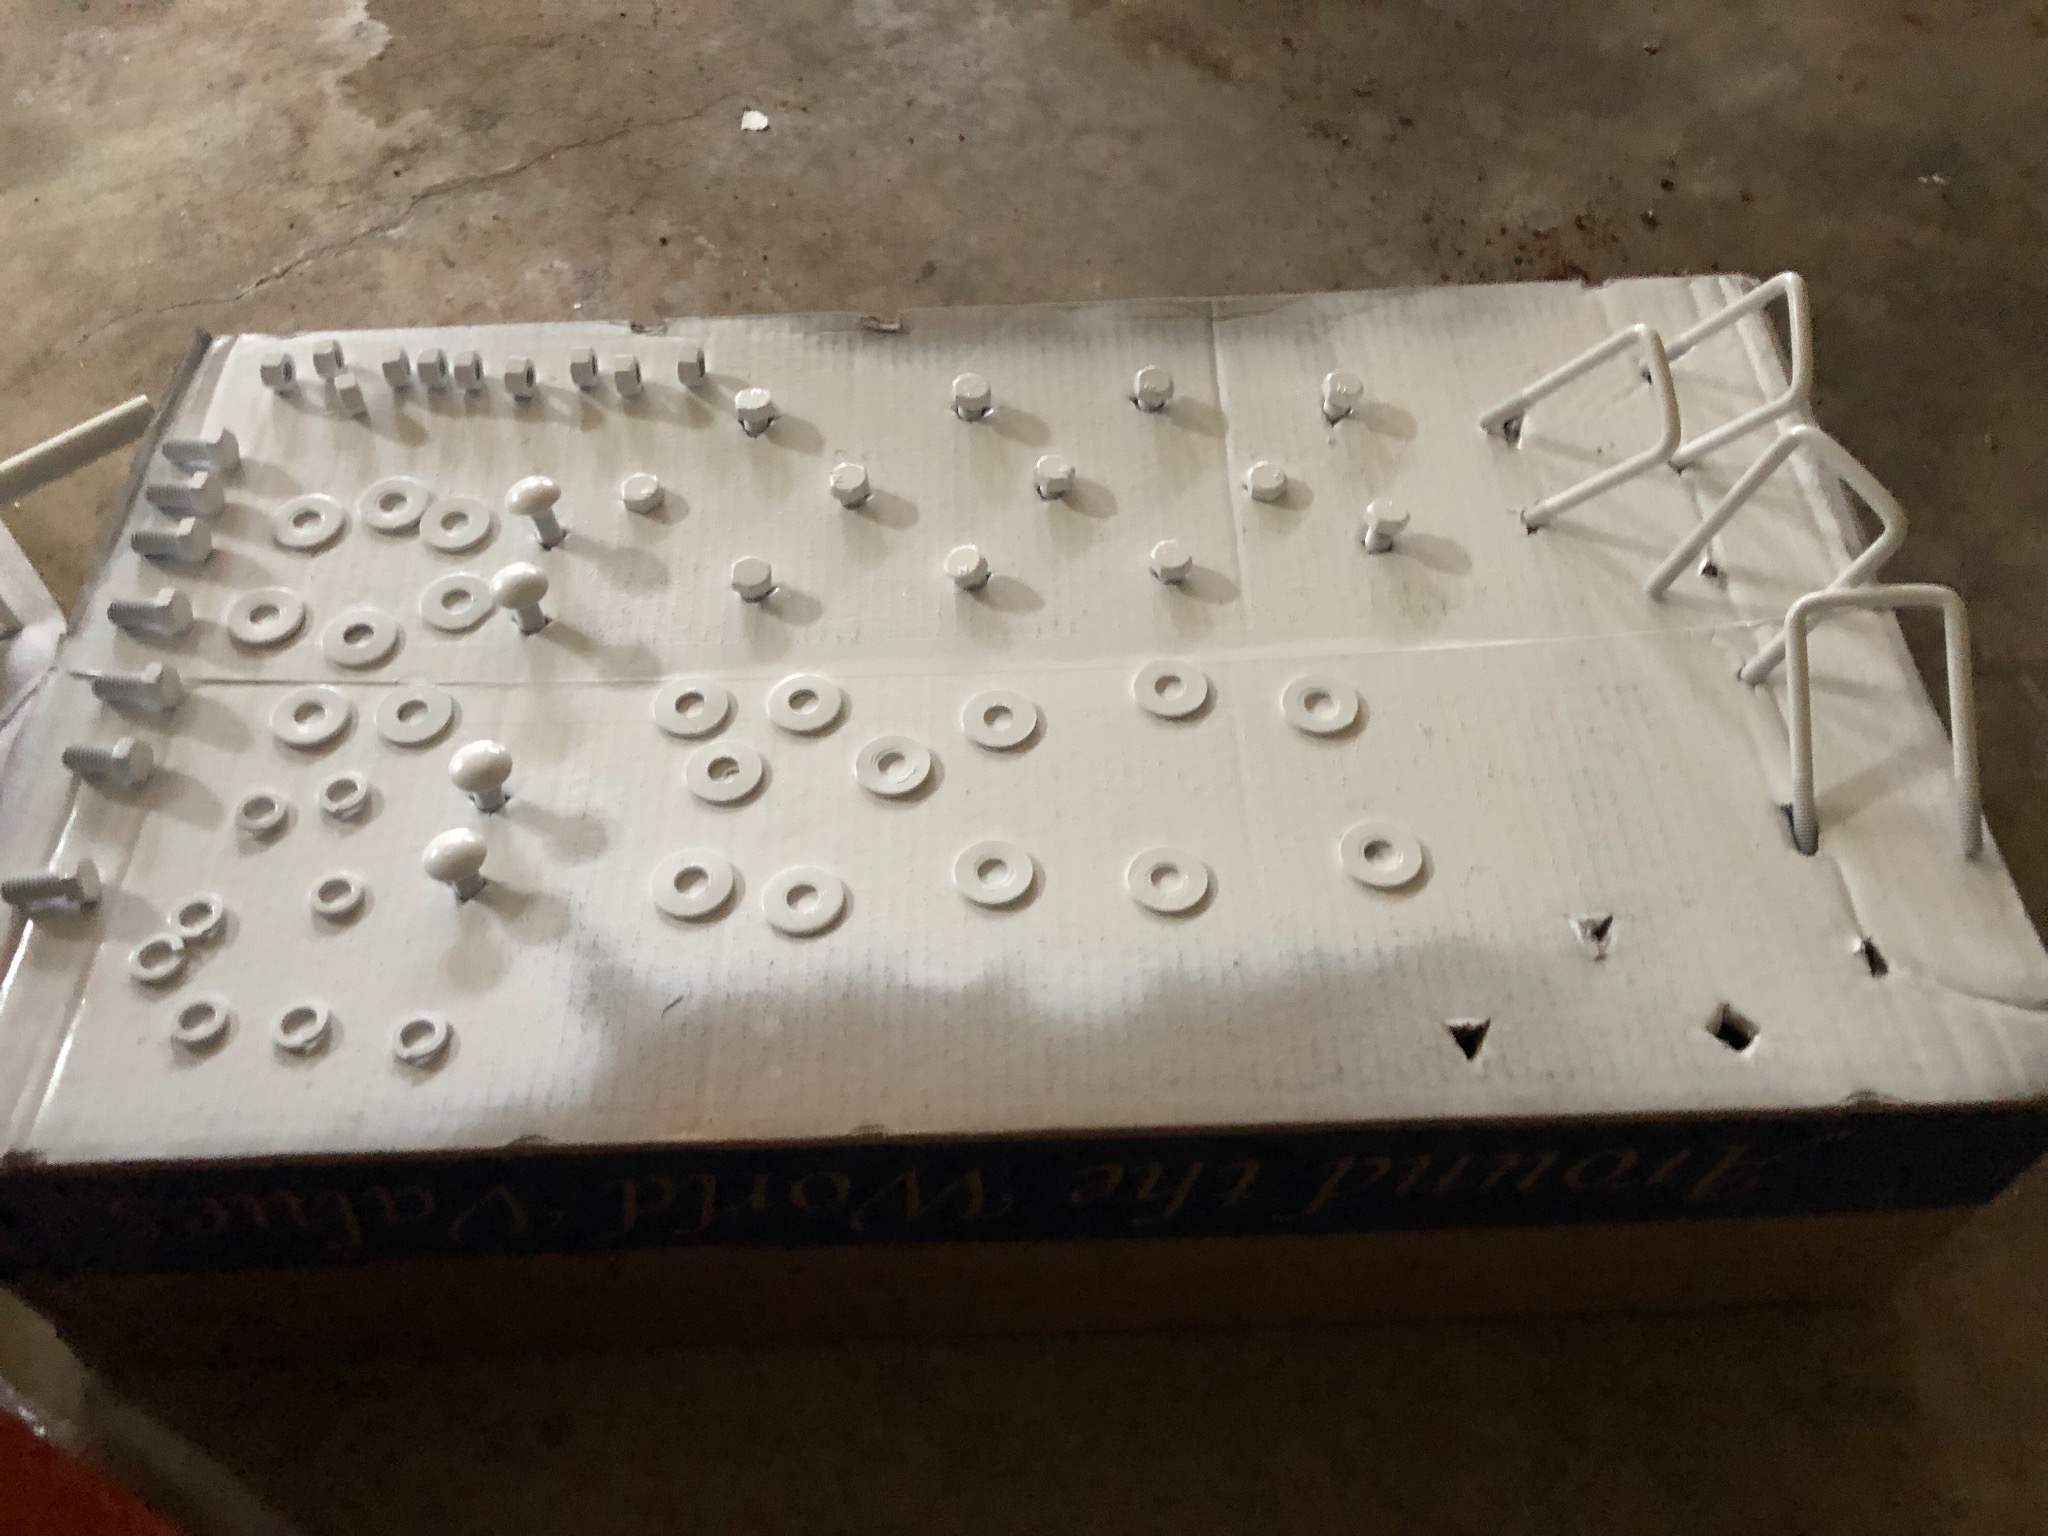
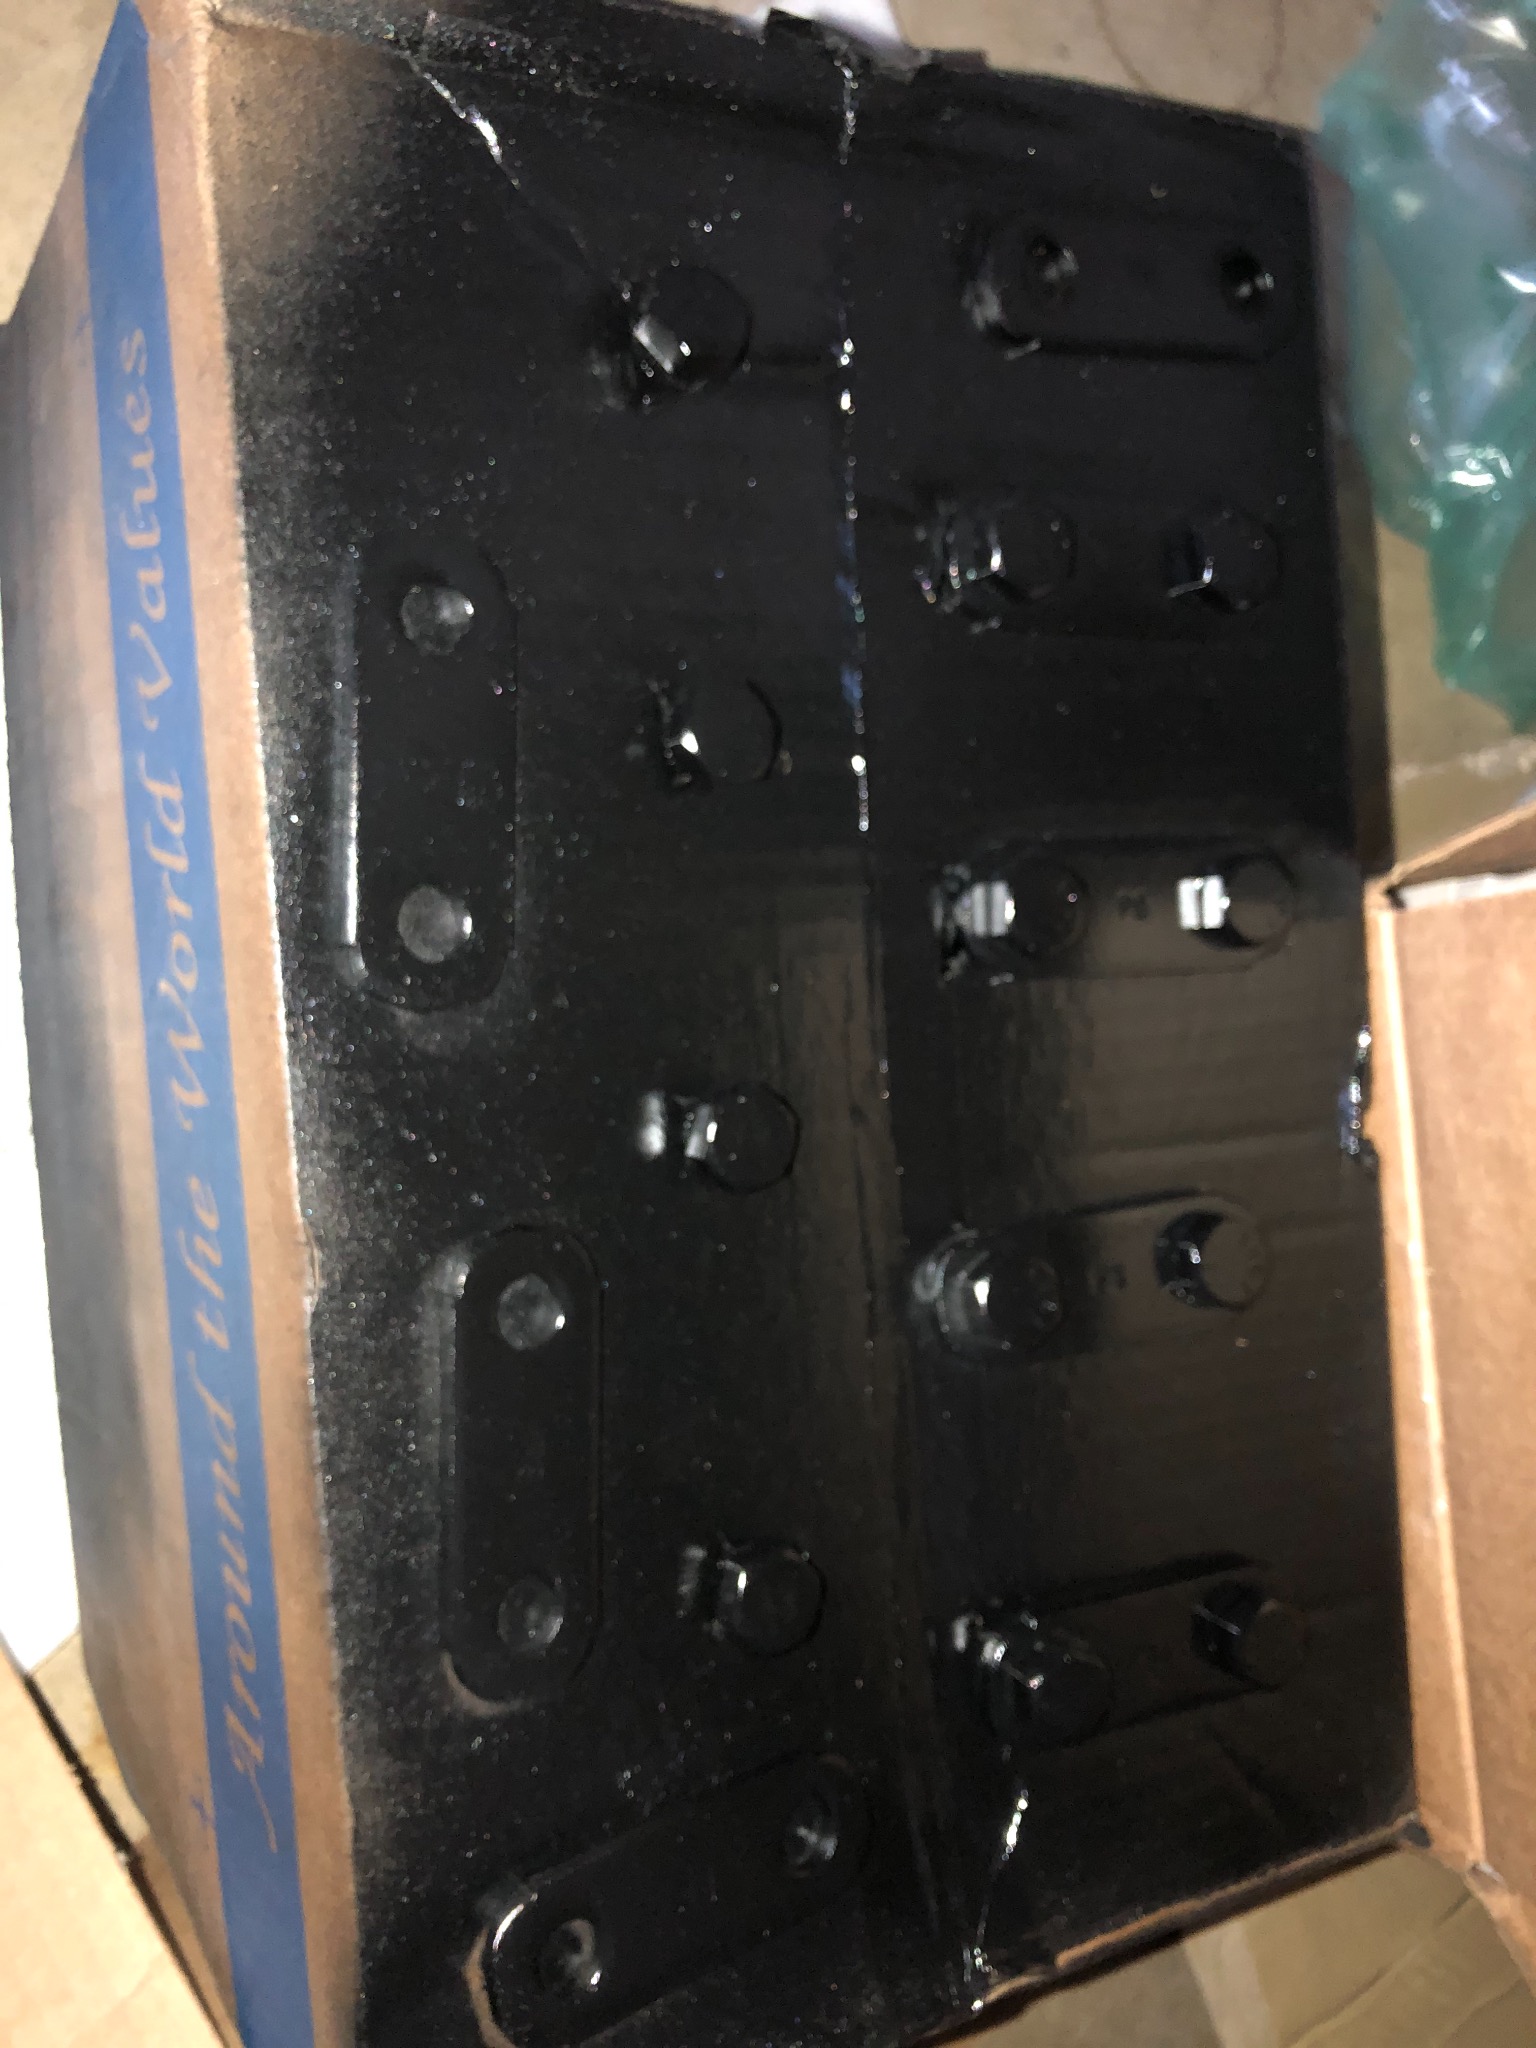
'65 TrailCar trailer repaint questions 3 years 2 weeks ago #144087

  • Dr.Go!
  • Dr.Go!'s Avatar Topic Author
  • Offline
  • Contributing Member
  • Contributing Member
  • Posts: 1719
  • Karma: 19
  • Thank you received: 125
Here are pictures of 2 crockpot batches. They all started with clear water and a few dashes of baking soda. I tried removing paint after 15 minutes of soaking, but only had about 15-20 percent success. The water was still clear at that point... so then I continued like Andreas suggested and cooked for many hours. The bubbling from simmering seemed to do the trick and that worked much better. 80-90 percent of paint came off with wiping with shop rags... and then the rest came off with 3-4 swipes of a small wire brush. Pretty cool... those came out of the yellow stained water. I have a few batches yet to do.

Please Log in or Create an account to join the conversation.

Dr.Go!

'65 TrailCar trailer repaint questions 3 years 2 weeks ago #144088

  • 63 Sabre
  • 63 Sabre's Avatar
  • Offline
  • Contributing Member
  • Contributing Member
  • Posts: 4676
  • Karma: 147
  • Thank you received: 167
Next week it's slow cooked pot roast for dinner?
Looks good.

Please Log in or Create an account to join the conversation.

'65 TrailCar trailer repaint questions 3 years 2 weeks ago #144089

and now you have stock for soup and other fine tasting vittals
Andreas
The following user(s) said Thank You: Dr.Go!

Please Log in or Create an account to join the conversation.

'65 TrailCar trailer repaint questions 3 years 2 weeks ago #144094

  • Dr.Go!
  • Dr.Go!'s Avatar Topic Author
  • Offline
  • Contributing Member
  • Contributing Member
  • Posts: 1719
  • Karma: 19
  • Thank you received: 125
Thanks guys. I really do appreciate this cool method. Without it, I would be using 63 Sabre advice and just buy new bulk hardware. It certainly would save time, but I am trying to keep as much original materials as possible. Although - with that said, I will be looking to use new LED lighting... has anyone used the lights that contain the white back-up lights? Seems I am always backing up at night and wish I had brighter light back there. Just curious if others have tried them.

Please Log in or Create an account to join the conversation.

Dr.Go!

'65 TrailCar trailer repaint questions 3 years 2 weeks ago #144109

  • Dr.Go!
  • Dr.Go!'s Avatar Topic Author
  • Offline
  • Contributing Member
  • Contributing Member
  • Posts: 1719
  • Karma: 19
  • Thank you received: 125
Sorry this is a slow moving and fairly boring thread, but hopefully shared information can help at one person. I know I have learned a lot from the advice I have been receiving, so thanks for all who post on the overall site. Here are most of the fasteners bagged up and free of yellow paint. Almost finished. Next it is time to clean and inventory all of the rollers. I see there are about 4-5 different ways these rod types were made with lots of different style keepers. A couple were nut and bolt. Some were round rod with metal push caps. Others has one mushroomed end with cotter key and washer on other end... some rods were grooved with the C clips. I have no idea what was the original method as even the roller brackets vary with at least 3 different methods of brackets and about 5 different sizes... yet it all looked like the proper roller position set up for this boat. Who knows... maybe I will just use the proper sized bolts with flat washers nylon locking nuts and make sure I clean and grease the shafts. One step at a time. I am waiting on bushings for leaf springs and some dust caps I ordered. Time for a hardware run to get more primer, paint and also that stuff 63 Sabre suggested for coating inside of fenders to prevent rusting from rocks chipping paint.
Attachments:

Please Log in or Create an account to join the conversation.

Dr.Go!

'65 TrailCar trailer repaint questions 3 years 2 weeks ago #144110

  • 63 Sabre
  • 63 Sabre's Avatar
  • Offline
  • Contributing Member
  • Contributing Member
  • Posts: 4676
  • Karma: 147
  • Thank you received: 167
Mark, we've all been there, different hardware, different fasteners, etc. The upside is you have all good rollers to work with and your pictures are right side up but it looks like some of the shafts are different diameters? Or not, can't really tell by the pics. I always found that the hammer on end caps are a real pain, Can't get them off when needed, rust up real quick and you have to pretty much destroy them during removal. IMHO go with stainless cotter pins and flat washers. That way you can always pull a roller shaft to grease it. Drawback is you have to drill holes in those round shafts...always a PIA for me. The bolt/lock nut is possible but just wouldn't look cool or original.
FYI here's a link to some different grease for water. I used corn head grease on my wheel bearings and rollers. You might be familiar with it since Merc used it in their earlier lower units. Most John Deer dealers should still have it.
I see walmart sells it on line but I would go to the dealer. One tube will last a lifetime.
www.walmart.com/ip/John-Deere-Corn-Head-Grease-SET-OF-2-AN102562/206919888?wmlspartner=wmtlabs&&adid=22222222222000000000&wmlspartner=wmtlabs&wl0=e&wl1=s&wl2=c&wl3=10352200394&wl4=pla-1103028060075&wl12=206919888_10000008859&wl14=corn%20head%20grease&veh=sem&msclkid=bb53571f42ae1503074b37547b2ea278&gclid=bb53571f42ae1503074b37547b2ea278&gclsrc=3p.ds

www.marinetalk.com/best-marine-greases/
The following user(s) said Thank You: Dr.Go!

Please Log in or Create an account to join the conversation.

'65 TrailCar trailer repaint questions 3 years 2 weeks ago #144111

  • Dr.Go!
  • Dr.Go!'s Avatar Topic Author
  • Offline
  • Contributing Member
  • Contributing Member
  • Posts: 1719
  • Karma: 19
  • Thank you received: 125
Thanks Cal. I couldn’t agree more about the cheap hammer on caps. You are correct that some pins were smaller diameter and had removable sleeve to increase diameter to match the roller’s pressed in sleeves. I will do some sorting and cleaning and also look through that box of rollers and pins I got from you. Between this trailer and another smaller one next year, I knew that treasure box would come in handy so thanks. I hear what you are saying about keeping the original look with pins instead of bolts. I will have to see how the usable hardware counts out. Who knows which of the 4 different pin and clip types were original?? Certainly your suggestion of the stainless pins and flat washers would be great... drilling would have to be added to the to do list. I was thinking of checking the hardware store for a nylon type fender washer in place of metal to be less abrasive on the painted metal bracket, but they would have to be substantial... though again... not original. However, my paint colors are not original and the original lights were not repairable so I guess the ship has sailed on a complete original look. I have 2 of the greases you recommended sitting on my shelf, so I am good there. I really appreciate those tips. It shows you have done tons more trailers than me. I appreciate that experience... especially because I know the trailer work is not as glamorous as the boat and motor work.

Please Log in or Create an account to join the conversation.

Dr.Go!

'65 TrailCar trailer repaint questions 3 years 1 week ago #144162

  • Dr.Go!
  • Dr.Go!'s Avatar Topic Author
  • Offline
  • Contributing Member
  • Contributing Member
  • Posts: 1719
  • Karma: 19
  • Thank you received: 125
Some parts came in from local trailer shop. Leaf Spring bushings, grease caps (because buddy bearing grease caps won’t fit under my baby moons), and shackle bolts, lock nuts and plates and safety cables... not chains like original, but my chains were questionable ... rusty and small and no safety hooks. I had the coil cables on a previous trailer and love that they are designed to not drag and don’t require adjustments between different tow vehicles. A little assembly and some painting. Finished cleaning all of the old hardware of paint and some rust... glad that tedious part is done.

Please Log in or Create an account to join the conversation.

Dr.Go!

'65 TrailCar trailer repaint questions 3 years 6 days ago #144164

  • 63 Sabre
  • 63 Sabre's Avatar
  • Offline
  • Contributing Member
  • Contributing Member
  • Posts: 4676
  • Karma: 147
  • Thank you received: 167
Wow! Brand new trailer coming up this spring. Some assembly required. Looking great. Trailers were something I never liked to tackle. More of a bearing and tire replacement only and some rattle can paint.
Can't wait to see the finished product.

Please Log in or Create an account to join the conversation.

'65 TrailCar trailer repaint questions 3 years 6 days ago #144166

  • Dr.Go!
  • Dr.Go!'s Avatar Topic Author
  • Offline
  • Contributing Member
  • Contributing Member
  • Posts: 1719
  • Karma: 19
  • Thank you received: 125
Had a few minutes to finish painting that hardware outside, but was running out of good weather when the wind kicked up to unruly speeds. I just started masking the fenders for that undercoating you recommended. Might be another week. The “new” trailer will likely end up with an “almost new” price tag because I keep going one more step. Good thing I saved for a year and then spread out my costs over almost a year. Looks like my hot dog and Ramen noodle diet will be around awhile longer. My bushings fit perfect in the leaf springs.., 7/8 inch OD... but the trailer rings are 13/16 and are too snug. Not sure if the powder coating got too thick inside as originally there was no paint inside those tube rings and I didn’t think to measure as original bushings were rubber and for 1/2 bolts... theses are nylon and have 9/16 bolts. Nylon is not forgiving like rubber, but I will like these better. All of the rubber ones had 30 percent of the walls totally gone... shaped like a C. I will shop to see if 13/16 OD exists... if not, then I will have to see if I can chuck them in a drill press and try a strip of rough sand paper. It is always the little things. I now also need to find 2 baby moon chrome hub caps that fit the 4 clip, 4 bolt 12 inch rim. I need to measure and find some swap meets. I think the lip on the caps might be 7 inches or a tad less. Does anyone know how to measure them?

Please Log in or Create an account to join the conversation.

Dr.Go!

'65 TrailCar trailer repaint questions 3 years 5 days ago #144172

how much room do you need for you chrome moon caps to fit ? This may not be a good I idea, but do you have enough room on your studs to add spacers behind your wheel rims out a bit, for your bearing buddy cap clearance ?
worst case, you can shim out the rim to see how much deeper the baby moon dish has to be ?

Please Log in or Create an account to join the conversation.

'65 TrailCar trailer repaint questions 3 years 5 days ago #144178

  • Dr.Go!
  • Dr.Go!'s Avatar Topic Author
  • Offline
  • Contributing Member
  • Contributing Member
  • Posts: 1719
  • Karma: 19
  • Thank you received: 125
Good thought about the wheel spacer idea to fit behind the buddy bearings. I had taken initial measurements, but once I saw it wouldn’t work, I didn’t even write down the dimensions. Looks like I will be remeasuring. I if I find a picture before I finish this post, I will include it. I also think I had seen another brand of those that might be a bit shallower. After that measuring, then I will need to see what spacers are available... see - I knew I could just keep spending money on my “budget” rebuild. Here are some pictures of the sloppy tape job I am doing for my bed liner undercoat spray. I found the hub and buddy bearing pictures with measurements. Looks like I need at minimum 4” and likely slightly more. Seems like I was about 3-3/8. Too late at night for me to measure now, so will have to check tomorrow. Who sells spacers for 4 bolt 12 inch rims and is it advisable to even run them. I don’t want to do something not recommended. I will have 2,200 pounds of combined axle rating with only about 1,400 pounds of boat, motor, and fuel, so not stressing trailer. All advice welcome.

Please Log in or Create an account to join the conversation.

Dr.Go!

'65 TrailCar trailer repaint questions 2 years 11 months ago #144243

  • Dr.Go!
  • Dr.Go!'s Avatar Topic Author
  • Offline
  • Contributing Member
  • Contributing Member
  • Posts: 1719
  • Karma: 19
  • Thank you received: 125
Trying to make more progress. I had to rig up my drill press with a large bit wrapped in tape to make a jig to slide up 4 separate nylon bushings. My front rings on the trailer were a sixteenth smaller diameter than the leaf springs. The nylon has no give like the old rubber bushings, so I had to reduce the OD. Started with sandpaper... not aggressive enough. Moved to a file, still taking forever and not aggressive enough. I then used a rasp and that worked doing 30-40 seconds with aggressive pressure... then back to the file for about 10-15 seconds to make smoother. That worked. I forgot to take a picture with the bushing on the bit, but you can see the pile of removed nylon from 4 bushings. Next I had to drill saddle holes because old hardware was 1/2 inch and new hardware was 9/16 inch. I left one side stepped to help when seating the splined neck on the bolts. I took 63 Sabre advice and painted the inside of the fenders. Also big thanks to my Admiral for doing most of the masking as I was terrible at that job. Started assembly. Hoping to get more assembly today. Long way to go, but gaining ground. I need to hurry as are northern season is pretty short.

Please Log in or Create an account to join the conversation.

Dr.Go!

'65 TrailCar trailer repaint questions 2 years 11 months ago #144245

  • Dr.Go!
  • Dr.Go!'s Avatar Topic Author
  • Offline
  • Contributing Member
  • Contributing Member
  • Posts: 1719
  • Karma: 19
  • Thank you received: 125
A little more progress. Now the tedious part. There are 3 different sized roller pin holes in the brackets. I will be making them all the same size now since I decided to make all pins the same and cut some new flat rollers. Wish I had decided this before powder coating... guess I will be pulling out the touch up paint. Likely the paint will rub off anyway like the original color did.

Please Log in or Create an account to join the conversation.

Dr.Go!

'65 TrailCar trailer repaint questions 2 years 11 months ago #144258

  • Dr.Go!
  • Dr.Go!'s Avatar Topic Author
  • Offline
  • Contributing Member
  • Contributing Member
  • Posts: 1719
  • Karma: 19
  • Thank you received: 125
One thing I am glad I learned on here... take a ton of pictures before taking things apart. Glad I did that as I figure out the jig saw puzzle with where brackets and bolts go... I am sure I misplaced some hardware with all of the shuffling I did removing surface rust and cooking off the paint. After making some progress installing roller brackets I checked the size of all of the roller axles and luckily I only have 3 brackets (5 holes) to drill. The overall progress is slow, but trying to chip away a little every chance I get. I hope when I eventually get done that I don’t forget to put lights on it and wire it.
Attachments:

Please Log in or Create an account to join the conversation.

Dr.Go!

'65 TrailCar trailer repaint questions 2 years 11 months ago #144260

  • 63 Sabre
  • 63 Sabre's Avatar
  • Offline
  • Contributing Member
  • Contributing Member
  • Posts: 4676
  • Karma: 147
  • Thank you received: 167
WOW! Looking great. Lots of work but seems you're over the hump.
Would almost be a shame to get it wet. Never take it on the highway or gravel road after a rain storm. What size are those wheels? I think I have a spare 4 hole tire/rim if you need a spare. Might even have the moon clips on it.

Please Log in or Create an account to join the conversation.

'65 TrailCar trailer repaint questions 2 years 11 months ago #144266

  • Dr.Go!
  • Dr.Go!'s Avatar Topic Author
  • Offline
  • Contributing Member
  • Contributing Member
  • Posts: 1719
  • Karma: 19
  • Thank you received: 125
Thanks. Those are 12” with 4 bolt. I have 5.30 x 12 inch tires. I am hoping to find a rim without clips, but if it does have clips, I could use it on the Wilson trailer next project. I will increase from 8” to 12” for fewer highway rpm’s.

Please Log in or Create an account to join the conversation.

Dr.Go!

'65 TrailCar trailer repaint questions 2 years 11 months ago #144338

  • Dr.Go!
  • Dr.Go!'s Avatar Topic Author
  • Offline
  • Contributing Member
  • Contributing Member
  • Posts: 1719
  • Karma: 19
  • Thank you received: 125
Tried several different saw methods...all manual. Hack saw worked ok but blade always walks off centerline as predicted no matter how hard I tried to make it behave. The belt sander squared up the cut. Then tried the old crosscut saw. The taller blade worked great keeping the cut square. Both take way too long for an old man. I think I need to see about renting a power miter cut off saw with a fine blade since I have lots of cuts to go. At least the result is what I wanted so that the width is wider than the tri-cat sponson hull.
Attachments:

Please Log in or Create an account to join the conversation.

Dr.Go!

'65 TrailCar trailer repaint questions 2 years 10 months ago #144464

  • Dr.Go!
  • Dr.Go!'s Avatar Topic Author
  • Offline
  • Contributing Member
  • Contributing Member
  • Posts: 1719
  • Karma: 19
  • Thank you received: 125
Tiny progress, but at least another step behind me. Using my son’s battery powered Milwaukee portaband band saw. It had a deeper and tighter blade than my 40 year old table top Craftsman band saw. Much more perpendicular cuts since the blade didn’t walk. Still used the belt sander to make up for my lack of my ability to hold a 90 degree cut. I decided to use the stainless pins and stainless cotter pins. However, the stainless fender washers would have cost the equivalent of another restoration project, so I opted for the zinc coated. Of course I went way further than my initial ideas, but one upgrade led to another. I have lots of measurements left to custom fit as this trailer has flat stock brackets that need angled wooden guides inside the catamaran sponsons to keep the boat centered. I likely need to finish the tongue and butt stop with winch and get the trailer under the boat so I can custom fit the contours and angles. Not looking for to that, but I am looking forward to cleaning up the garage and hopefully getting that trailer under the boat. It will be awhile because I still need to get a light kit and wire it up. Time keeps slipping by faster than I can make progress. I am trying to do little things after supper as I can’t count on weekends for production… thanks a lot yard work and car repairs. Keep alternator went at 323,000… guess I shouldn’t complain since it’s still on the road… had to bring Mom home on battery alone and 40 minutes of darkness… lucky lucky to make it home on a Sunday night!
Attachments:

Please Log in or Create an account to join the conversation.

Dr.Go!

'65 TrailCar trailer repaint questions 2 years 10 months ago #144468

  • 63 Sabre
  • 63 Sabre's Avatar
  • Offline
  • Contributing Member
  • Contributing Member
  • Posts: 4676
  • Karma: 147
  • Thank you received: 167
Great progress on the trailer. Now that days are longer and warmer you can see the end of your journey. Life does seem to get in the way of the priorities.
The Jeep alternator is right on schedule. With my old '98 xj the alt went +/- 325k also. Went out coming back from Weston to GB at night in winter. Had to run on battery power, no heater, radio. Murphy's law was in full effect.
Trailer is looking great, Can't wait to see it up close sometime this summer.

Please Log in or Create an account to join the conversation.

'65 TrailCar trailer repaint questions 2 years 10 months ago #144473

  • Dr.Go!
  • Dr.Go!'s Avatar Topic Author
  • Offline
  • Contributing Member
  • Contributing Member
  • Posts: 1719
  • Karma: 19
  • Thank you received: 125
Yikes on that winter trip home… and I was just telling Mom on that road trip… on the bright side it is not the middle of winter… you had the bigger challenge! Thanks for the encouragement. I need to pound it when I can. I want the head stop to be more secure as the tip trailer tongue has slop enough that when I use the tongue winch. It shifts over and is not centered on the bow eye. I will install some shims between the two parts and I won’t need the tilt feature, so will take the slop out and also want to fashion an additional bow stop… every time I get fussy, that just adds time and money… but in the end, it usually prevents problems and reduces cussing so I have heard.

Please Log in or Create an account to join the conversation.

Dr.Go!

'65 TrailCar trailer repaint questions 2 years 10 months ago #144491

  • Dr.Go!
  • Dr.Go!'s Avatar Topic Author
  • Offline
  • Contributing Member
  • Contributing Member
  • Posts: 1719
  • Karma: 19
  • Thank you received: 125
Just a couple of pictures. One picture shows the spare tire mount with rim… of course I need one more tire. . I am hoping to use some rod couplings so that I can attempt to stack 2 spares right there as the hull is shallow there. Glad I took lots of pictures before taking it apart and kept the parts and fasteners organized as I am moving slow enough that I could easily start forgetting where certain brackets belong. I think this trailer will have to go back together in one hour increments after work and supper a few days a week. Plenty of chores that need done before hobby work.
Attachments:

Please Log in or Create an account to join the conversation.

Dr.Go!

'65 TrailCar trailer repaint questions 2 years 10 months ago #144492

  • 63 Sabre
  • 63 Sabre's Avatar
  • Offline
  • Contributing Member
  • Contributing Member
  • Posts: 4676
  • Karma: 147
  • Thank you received: 167
Would rod couplings fit through the lug holes? From your pic it looks like those might be two 9/16 bolts welded to the mount bracket. Maybe those could be ground off and drilled out to accommodate longer bolts or threaded rod?
Top them off with chrome cap nuts,

or maybe just go vertical with a wheel mounted on each side of the tongue with threaded rod(s), one rod above the tongue and another below. That would lower the spare profile.
Just a suggestion.
Attachments:

Please Log in or Create an account to join the conversation.

'65 TrailCar trailer repaint questions 2 years 10 months ago #144497

  • Dr.Go!
  • Dr.Go!'s Avatar Topic Author
  • Offline
  • Contributing Member
  • Contributing Member
  • Posts: 1719
  • Karma: 19
  • Thank you received: 125
I like your ideas and love those chrome acorn cap nuts. You are correct… those are welded studs. I just figured the rod couplings would clamp down the lower tire and then I could use threaded rod with double nuts for top tire. I will do some fitment checking if I ever get it done and back under the boat. I didn’t take a good picture of spare under hull from before, but was thinking I would have the clearance for 2 stacked tires.., if not, your idea should solve the problem, so thanks! Here is tonight’s progress. New pictures of bow stop, winch bracket, and new winch I bought for $3 at a garage sale 2 years ago.
Attachments:

Please Log in or Create an account to join the conversation.

Dr.Go!

'65 TrailCar trailer repaint questions 2 years 10 months ago #144535

  • Dr.Go!
  • Dr.Go!'s Avatar Topic Author
  • Offline
  • Contributing Member
  • Contributing Member
  • Posts: 1719
  • Karma: 19
  • Thank you received: 125
Installed the existing crank lift with wheel and new coated coiling safety chains. I liked them on my old snowmobile trailer as they don’t need perfect lengths to keep from dragging or binding. It will take a while to come up with a custom bow stop from my stock parts and maybe a few bonus parts from other trailer parts collection or scrap metal supply. Still chipping away a little at a time.
Attachments:

Please Log in or Create an account to join the conversation.

Dr.Go!

'65 TrailCar trailer repaint questions 2 years 10 months ago #144559

  • Dr.Go!
  • Dr.Go!'s Avatar Topic Author
  • Offline
  • Contributing Member
  • Contributing Member
  • Posts: 1719
  • Karma: 19
  • Thank you received: 125
I made some tiny custom brackets to hold side marker lights. I also am trying the lights with the backup light option 5 pin set. I think I might like this. I bought some stainless L- brackets to mount my original tail light brackets so I could use existing available mountings without having to drill new holes into the trailer because I had covered the original mounting holes when I slid one axle back. Very slow work, but I only wanted to do it once.

Please Log in or Create an account to join the conversation.

Dr.Go!

'65 TrailCar trailer repaint questions 2 years 10 months ago #144562

  • 63 Sabre
  • 63 Sabre's Avatar
  • Offline
  • Contributing Member
  • Contributing Member
  • Posts: 4676
  • Karma: 147
  • Thank you received: 167
Cool! Must be a qualified electrician in the house somewhere. Those LED lights take the pain of rusted connections and corroded wires out of the mix.

Please Log in or Create an account to join the conversation.

'65 TrailCar trailer repaint questions 2 years 10 months ago #144569

  • Dr.Go!
  • Dr.Go!'s Avatar Topic Author
  • Offline
  • Contributing Member
  • Contributing Member
  • Posts: 1719
  • Karma: 19
  • Thank you received: 125
At least it is only 12volt dc so I didn’t get shocked lol. Though 40 years ago I did see a friend using bare metal pliers to remove the battery from his Judge GTO. When he tried removing the positive before the negative, his wedding ring hit the frame of the car just for a moment… but a direct short discharging the battery’s full amperage instantly caused smoke to come from his finger as he shouted in pain. That gold ring got so hot it peeled the skin of as he quickly pulled it off… it just pulled the skin off. Lesson learned… pull the negative off first. And don’t wear a ring around electrical. Next step is attaching the bow stop. Then clean up garage and under boat so I can hopefully get this trailer back under the boat. Time to be extra careful or I will have another lesson learned to report… but hope not. I may have the record for the slowest trailer restoration. I have to fix a sticky break caliber before I get back to this. Always a to do list that gets in front of the fun to do list.

Please Log in or Create an account to join the conversation.

Dr.Go!

'65 TrailCar trailer repaint questions 2 years 10 months ago #144572

  • 63 Sabre
  • 63 Sabre's Avatar
  • Offline
  • Contributing Member
  • Contributing Member
  • Posts: 4676
  • Karma: 147
  • Thank you received: 167
First lesson about the ring....don't get married.

Please Log in or Create an account to join the conversation.

'65 TrailCar trailer repaint questions 2 years 10 months ago #144652

  • Dr.Go!
  • Dr.Go!'s Avatar Topic Author
  • Offline
  • Contributing Member
  • Contributing Member
  • Posts: 1719
  • Karma: 19
  • Thank you received: 125
Finally got the trailer under the boat. I had to temporarily use the old yellow wooden guides for now and will fit and cut some new pieces once I determine how I want them to fit. The random flat stock used was cut and drilled differently for each location… 16 pieces and only pairs are similar… fun puzzle to put back together… old pictures helped. Now time to adjust the front center roller as it is high and causing a few fixed mid rollers to have air gaps. At least I can organize my tools and sweep the floor and try to make the garage useable again. I put an eye hook overhead and used my grandpas pulleys likely from the 40s and my old barefoot ski rope to fashion my mechanical advantage with block and tackle to ease the load on this old man. The front of the boat is light. Back sitting on saw horses.., mid and front were on tires and shimmed cinder blocks… pulled out mid stuff before pulling front up so that I wasn’t working under a suspended load… trailer sat a little higher on 2 axles… so lifted front and rolled trailer 75 percent back before rollers hit. Connected strap and pushed under as I cranked it on. Relieved I did not drop the boat or break anything… yet anyway.
Attachments:

Please Log in or Create an account to join the conversation.

Dr.Go!

'65 TrailCar trailer repaint questions 2 years 10 months ago #144655

  • 63 Sabre
  • 63 Sabre's Avatar
  • Offline
  • Contributing Member
  • Contributing Member
  • Posts: 4676
  • Karma: 147
  • Thank you received: 167
Excellent! Appreciate the work put into the placement. I always had a hard time with a single "V" bottom, you're doing it with three. Now you get to lay on your back with a floor jack to adjust the rollers and blocks. I always found a way to fall asleep while doing that. Can't wait to see the finished project hooked up to the tow vehicle on a sunny day.

Please Log in or Create an account to join the conversation.

'65 TrailCar trailer repaint questions 2 years 10 months ago #144658

great work !

Andreas

Please Log in or Create an account to join the conversation.

'65 TrailCar trailer repaint questions 2 years 10 months ago #144663

  • Dr.Go!
  • Dr.Go!'s Avatar Topic Author
  • Offline
  • Contributing Member
  • Contributing Member
  • Posts: 1719
  • Karma: 19
  • Thank you received: 125
Thanks guys. Yes… I will need to spend a little time on the creeper under there. I will need to get some treated wood and take quite a few custom measurements. Though I use transom straps… the guides will keep it from hopping side to side.

Please Log in or Create an account to join the conversation.

Dr.Go!
  • Page:
  • 1
  • 2
Time to create page: 0.665 seconds

Donate

Please consider supporting our efforts.

FG Login

Glassified Ads

1975 16ft Cobalt
( / Boats)

1975 16ft Cobalt
03-27-2024

Homelie/Bearcat
( / Engines)

noimage
03-17-2024

Thunderbird Apache 1956 hardtop
( / Boats)

noimage
03-10-2024

FiberGoogle

Who's Online

We have 7896 guests and one member online